Monday, February 7, 2011

What to eat when your gum is aching

One of those days where the only food I can eat aside from pudding and tofu is rice porridge. I loathe rice porridge, oatmeals and the like. Not that I don't know how to make em, my family thinks I make the best banana cream oatmeal, I just do not like the texture. Everything about porridge is wrong, bland, mushy, eeuuuggghhhhhhhhhhh!

When you have gum ache, short of starving yourself is to eat rice porridge. I started out adding as much flavor in as possible. Because I hate watery porridge, I try to make mine as thick as possible.

Broth -  The first layer of flavor has to come from the broth. Since the main composition of porridge is water, it is of utmost important that the broth is well layered with flavor. Homemade chicken broth it is.

Grain - Rice grains; long or short doesn't really matter.

Meat - Another medium to add flavor. When you have a gum ache, not like you can chew anyway. The best thing to do is use ground meat; be it pork or beef. I love to infuse mine with ginger, soy sauce, sesame oil, rice wine, sugar and pepper.

Throw everything into a pot and let it simmer for a long long time till it finally becomes this. Easy and comforting for one of those days where everything feels like Bleh.............

Did I mention that I am not a fan of porridge, oatmeals and the likes. It has been 5 days now, gum feeling all better today but still on semi-solid food diet for fear of triggering another bout of abscess. Sigh. 

Truth to be told, rice porridge is a very simple meal to make. All you need is rice and lots of water.

Boil till everything becomes a mush. The biggest thing is the seasoning. I tried to incorporate as much flavor into the porridge as possible since it is going to taste Blehhhhhh anyways. I find that using homemade chicken stock in lieu of water is the best way to go. However, if you do not have any chicken stock sitting in the fridge, your next best bet will be water. Season the meat that you are using heavily though, since that will be the only seasoning to help impart flavor in the porridge.

Cantonese Rice Porridge
Ingredients
1 cup of uncooked rice
8 cups of chicken stock or water
1/4lb of ground meat of choice (pork, chicken, beef)
1 tsp rice wine
2 tsp soy sauce
1 tsp sesame oil
1-inch of ginger, grated and juiced
salt and pepper to taste
scallion, sliced (optional)
chinese fried dough (optional)

Directions
1. Combine ground meat with seasoning in a bowl. Mix well and let sit in the fridge for at least 30 mins to marinade.
2. In a stock pot, combine chicken stock and rice. Cook on high till mixture comes to a boil. Reduce heat on medium low. Cook for 30 mins, stirring occasionally.
3. Turn heat down to low. Add in ground meat by teaspoonful. Continue to cook for another 15 mins, stirring occasionally. 
4. Remove from heat. Serve with a dash of pepper and sesame oil. Top with sliced scallion and chinese fried dough (optional)


Sunday, February 6, 2011

Homemade biscuit

I certainly think that a little clarification with the terms biscuit is required in this case.

Biscuit to English and Asian readers are the type that you can find in a box or a pack, the thin crunchy crisp that is mostly sandwiched in cream, usually sweet and flavored. However, biscuit to American are baked fluffy pastry, much like scone, only without dried fruits in it. Biscuit is meant to be on the bland side, with just a hint of salt, as a vessel for sausage gravy, although it can also be eaten with butter and jam as well. Refer to Popeye's biscuit.

The homemade version of biscuits are a lot fluffier than the commercially baked ones. I have had Popeye's biscuit on numerous occasion and honestly, I think my biscuit is a lot better than theirs. Possibly because my recipe is adapted form Alton Brown, the food network star, who also happens to grow up on southern fare.


I love baking biscuit. Especially when it comes out nice and tall. The right texture of biscuit should be fluffy and moist, never dry. The crust should have a little crunch but that's as far as the crunch should go. Anymore than that, it will be too dry.


I even served this in place of cream scone for Mother's Day Party every year, with homemade lemon curd and cream. Trust me, these are really good, be it sweet or savory.

Southern Biscuit Recipe
(By Alton Brown Biscuit Recipe )
2 C. flour
4 tsp baking powder
1/4 tsp baking soda
3/4 tsp kosher salt
2 Tbsp butter
2 Tbsp shortening
1 C. chilled buttermilk (or 1 C regular milk mixed with 2 tsp. white vinegar works fine too)

Directions
1. Preheat the oven to 450F or 232C.
2. Mix all of the dry ingredients together. Add butter and shortening and cut in with knives, forks, or a pastry cutter. You can use your fingers too if you want.
3. Make a well in the center and pour in the buttermilk.
4. Stir the wet and dry ingredients until they just come together. It will be sticky.
5. Turn the dough onto a lightly floured surface and knead 10 times by folding it on itself. (His tip from the show.)
6. Press into a 1 in. thick round and cut out with a 2 in. cup or cutter. (just reform the scraps and cut until you've used everything)
7. Place biscuits on a sheet so they just touch and cook at 450* for 15-20 min. or the tops are lightly golden brown. (I've had best results with the air cushioned pans used for cookies.)


Note: You want to handle the dough as little as possible so that the biscuit will come out light and fluffy. 

Friday, February 4, 2011

Breakfast Sausage and Gravy

It is truly a great southern invention, breakfast sausage and gravy. I just love the biscuit drenched in sausage gravy. There is something magical about freshly baked biscuits with sausage gravy. It is delicious and filing, makes one feels nice and warm inside. Waking up in the morning has never felt so good.


Sausage Gravy
(Serves 4)


Ingredients
1/2 lb homemade sausage
1 tablespoon of canola oil
3 tablespoon of butter
3 tablespoon of flour
3 cups of milk
1/2 onion, chopped fine
1 scallion, finely sliced
Salt to taste
Lots and lots of black pepper

Directions
1. In a large pan, heat a tablespoon of canola oil over medium high heat.
2. Brown sausage, breaking it up into small pieces. Remove with a slotted spoon into a dish.
3. Reduce heat to low. Melt 3 tablespoon of butter. Once butter begins to bubble, add in chopped onion. Cook till soft.
4. Add in the flour. Cook for 1 minute. Turn down the heat, if necessary, so that flour will not brown.
5. Using a whisk, whisk 3 cups of milk into flour and butter mixture in pan. Whisk rigorously to ensure there are no lumps.
6. Turn heat up to medium. Continue to stir with a wooden spoon while cooking.
7. When gravy starts to come up to a boil, return sausage into pan. Add in lots and lots of cracked pepper and salt to taste. Let cook till gravy comes to desired thickness, usually another 5 mins or so.
8. Turn the heat off and stir in the scallion.
9. Serve sausage gravy atop freshly baked biscuits. 

Thursday, February 3, 2011

Asian Delicacy- Tau Sar Pneah

This is going to be a long winded post. Read on, only if you are a fan of Tau Sar Pneah. If you don't even know what this is, then move on to the other post. It will be a waste of your time to read this entire blog.


When I was growing up in Malaysia, Tau Sar Pneah is a special treat, mainly because at the time this delicacy can only be found in the northern state of Malaysia, namely Penang, the island of great food and heaven for gluttons. A few times a year whenever a family member or a friend who will travel to Penang for business or leisure, Tau Sar Pneah will be the priced souvenir.

Perhaps it is the flaky layers of its pastry, maybe that tasty mung bean filling or just maybe one always want what she can't have, the lure of Tau Sar Pneah in those days was powerful. Never in my wildest imagination that someday when I grew up, I will be making these babies at home. Yeah, the impression has always been that only the skilled bakers from the two famous Tau Sar Pneah place in Penang have the secret recipe to these tasty morsels. So, you can imagine my joy and excitement when I found this recipe online from my cooking guru-Aunt Lily of the famous blog- lily wai sek hong

Needless to say, curiosity got the better part of me and some brain cells chant endlessly in my head "Make this you must!" (Okay, I ripped this off Yoda!)

The process of making this Tau Sar Pneah is really tedious and not for the faint of heart. Sure, after reading the 3 steps procedures, you may want to say let's just buy this somewhere. Let me assure you, the end result is really rewarding.

On to Step 1 of the 3 part procedures. First, you have to make the filing. This is the easy part, sort of.


Soak the mung beans for 2-3 hours in cold water. Rinsed and placed in a steamer. Steam for 15-20 mins on high heat till it is soft. Mashed and add in sugar & salt. Place aside. Next, fry some shallots in oil. Remove the shallots for use later.

Over low heat, stir fry the mung beans until it is dry and you can easily shape it into a ball. This will take approximately 20 mins.

Roll them out into 30 portions.

Step 2: Tackle the dough. The recipe calls for an oil dough and a water dough. Like most Chinese pastry recipes, the oil and water dough method ensure flakiness of pastry.

Dough A-Oil Dough which consist of only flour and shortening
Shape it into a tight ball.
Wrap in plastic and let it rest for 30 mins. Label it as A. There is a method to this whole madness. Repeat the same process with the water dough, B.

Once both dough has been rested for 30 mins on the counter, you can now start the assembly process.
Divide both dough into 30 equal portions. Just eye ball them.
Flatten dough B, the water dough. Wrap around the oil dough, A. Next you will flatten it out with the palm of your hand on the counter and roll it out in a rectangle. Fold in thirds, and roll it out into a rectangle again. Next, roll it up like a swiss roll. Move it 90 degree, so the tall side is up. Flatten it into a ball with your palm and roll it out into a circle, about 4 inch in diameter. Wrap a mung bean filling in the middle and crimp the base to seal. Brush top with egg yolk and sprinkle on some sesame seeds. Bake for 20 mins and Voila!

Tau Sar Pneah
(Adapted from Lily Wai Sek Hong)
 http://lilyng2000.blogspot.com/2008/05/tau-sar-paeng.html


Ingredients:

Dough A:
240 g flour
120 g shortening

Dough B:
240 g all-purpose flour
60 g confectioner's sugar
60 g shortening
120 ml water


Filling (sweet):

1 1/2 cup peeled mung beans (soak for 2-3 hrs, steamed and mashed/blended)
6 tbsp cooking oil
4 level tbsp shallot, sliced thinly
1 cup sugar
1 tsp salt


Method:


Filling:
Combine sugar, salt, and mashed beans in a large bowl. Mix well.

Heat oil in wok or pan. Stir-fry the shallots till fragrant and lightly browned, removed fried shallot and set aside for later use. Add bean mixture, stir-fry on low heat till it becomes dry and able to form a ball.
Remove from heat and stir in fried shallots. Cool completely, divide and shape filling into 30 equal portions.

Dough:


Preparation for dough A and B is done separately and the same method applies.
Bring together all ingredients for each dough, mix well and knead to form soft dough.
Cover and let them stand for 30 minutes.
Divide and shape each dough into 30 equal portion balls.

Assemble:
Wrap dough B around dough A.
Roll it out as thin and rectangular in shape as possible. Fold the sides in making 3 layers.
Repeat the rolling and folding again.
Roll it out into 10 cm/4 inch diameter circle and wet the surface of circle.
Place the filling at the center. and ring all edges together, pinch to seal.

Egg wash and sprinkle some sesame seeds on the top if desired.

Baked Tau Sar Paeng:
Preheat oven at 180 degree C/375 degree F and bake for 20 minutes till golden brown.

(Note: If you are not health conscious, I find that using pure pork fat is the key to achieving the traditional tau sar pneah taste. Simply melt some pork fat in a pan to get 6 tablespoon of oil and substitute the oil with the pork fat lard. Let the tau sar pneah cool completely before serving. The filing may be a little wet when it comes out of the oven. As it sits, the water will evaporate, giving you the right texture of tau sar pneah filing.)


Brinner for the Winners - Breakfast Sausage

I love brinner. Brinner is a term coined on the sitcom "Scrub" a few years back when Turk is obsessed with breakfast for dinner, hence the term brinner. We don't usually have a big breakfast, not even on weekends as we try to eat as healthy as possible. Breakfast usually consisted PB&J or cereals with skim milk. Go figure!

Every now and then, I like to surprise my family with brinner. Just when they do not expect to get breakfast at dinner time, in come brinner. Brinner is always considered a welcome meal from the usual dinner fare. I will not say it is easy, as everyone in the family has their favorite breakfast items.


Mom with her poached egg on toasted english muffins


Dad and I with our biscuit and sausage gravy. And Jamie with his pancakes and bacon. In fact, the last thing that is easy about the whole brinner concept is that everyone gets what they want and it keeps everyone happy.

I will gladly assume that everyone knows how to make poached eggs, so I will not post a recipe here. If you need one, post it in the comment box and I will put up a post for it.

The highlight of today's post is breakfast sausage for the sausage gravy. Biscuit with sausage gravy is a southern thing. Why or how it finds its way on our breakfast table is thanks to all the southern cooks on Food Network. They made it looks so yummylicious that I have no choice but to try it. When we first started making sausage gravy, we took the easy way out and bought Jones Breakfast Sausage. It was good until we read the label and got a good shock of our life. The amount of salt used was way over the recommended daily intake allowance.

In an attempt to make it somewhat healthier, we have decided to make our own breakfast sausage. It came out so good that we have not look back since.

Homemade Breakfast Sausage

Taste as good as Jones, minus the salt.


Homemade Breakfast Sausage

Ingredients
1 lb of ground pork
1 teaspoon salt
1 teaspoon of black pepper
2 teaspoon of chopped dried sage leaves
3/4 teaspoon of Bell's seasoning
1 teaspoon of thyme
1 teaspoon of paprika
1/2 teaspoon of cayenne pepper (optional)
1 teaspoon of onion powder
1/2 teaspoon of garlic powder
3-6 tablespoon of ice cold water, more if needed

Directions
1. In a large bowl, combined all ingredients except for water.  Mix till well combined.
2. Add in 3 tablespoon of water and stir to combine. Mix till meat feels sticky. Add more water if needed. Adjust water depending on the fat content of the ground pork. If ground pork is lean, more water will be needed to get the right texture. 
3.  Divide pork mixture into two portions. Roll into a log on plastic wrap. Wrap tight and cover with foil. Keep in freezer.

Note: You can shape it into patties and fry in a pan for breakfast. Alternately, use it in sausage gravy. The flavor will meld as you let it sit longer in the freezer. We usually keep ours in the freezer for at least 2 weeks before consuming.


Wednesday, February 2, 2011

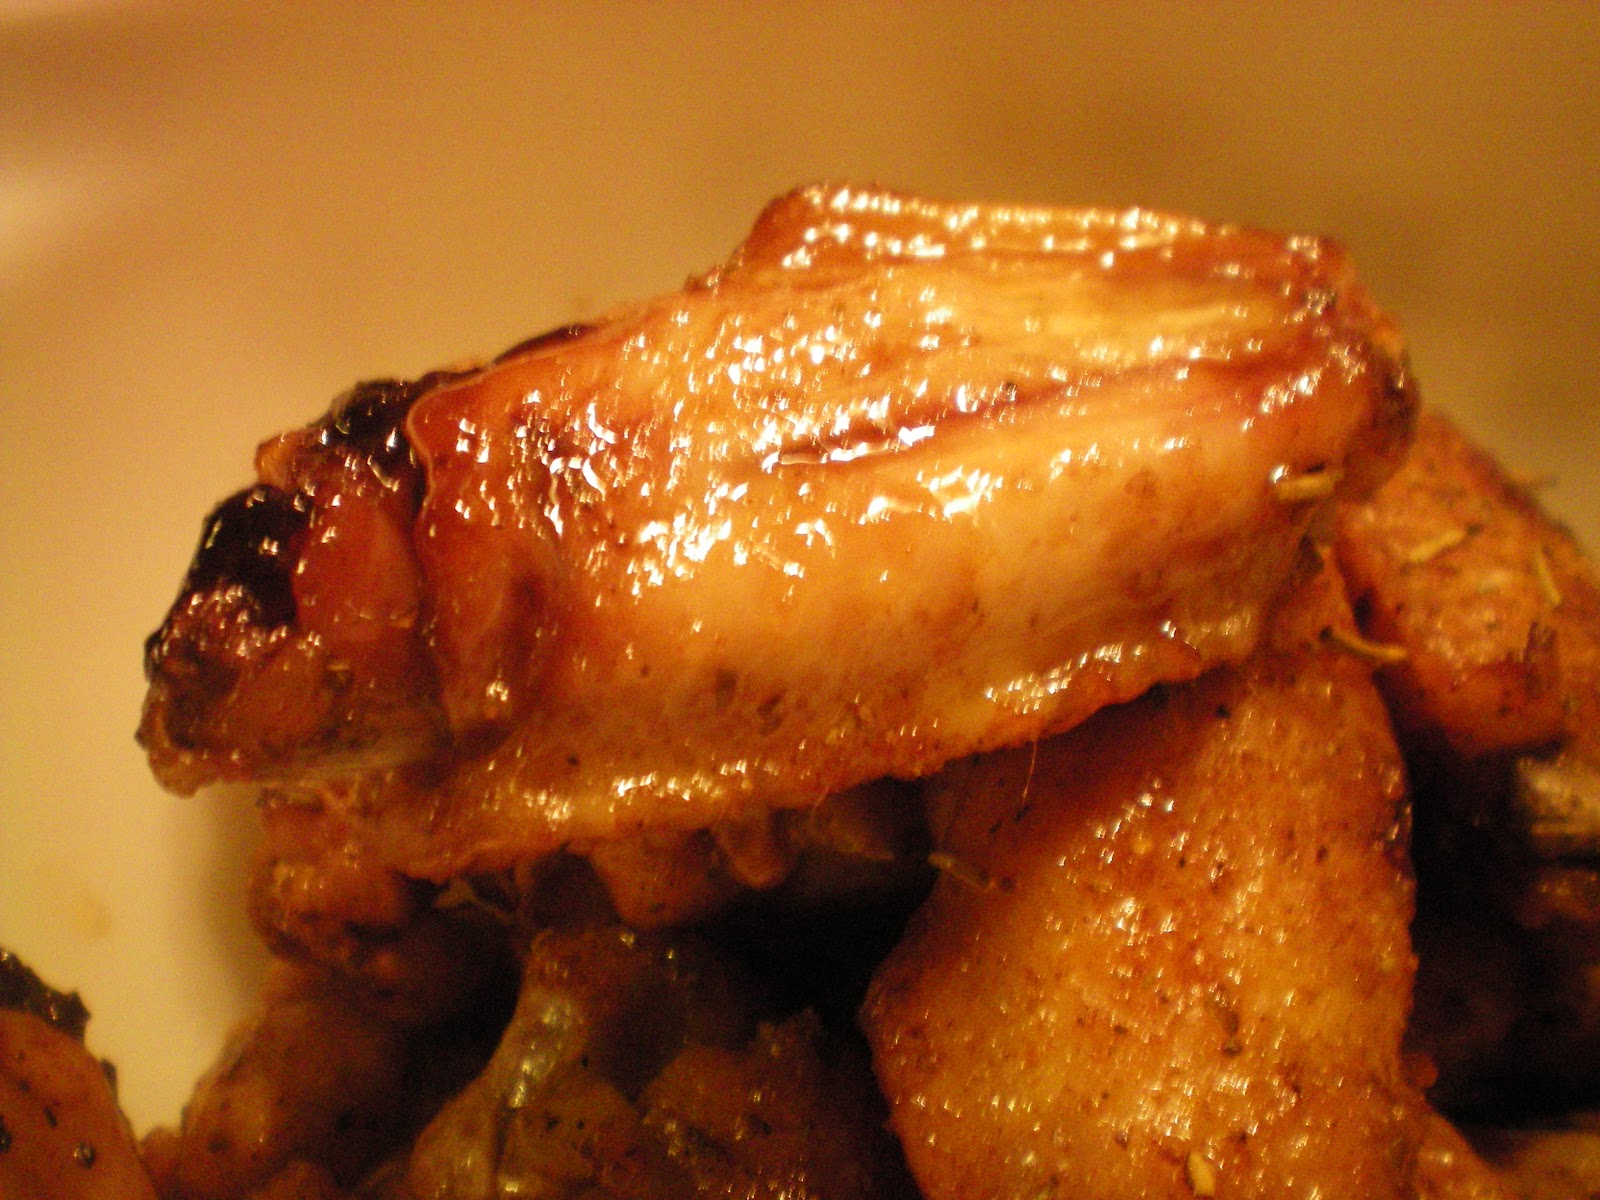
Easy Peasy Super Bowl Wings

Superbowl is coming soon, maybe, depending on the snow. The snow storm has been horrendous lately that we spent most of our time shoveling. It is a good thing. Got our workout time in spite of the weather.

As a tradition here in the US, we celebrate SuperBowl with, what else, food. Superbowl, celebrated just like other holidays calls for its own food. Just like Thanksgiving with Turkey, Christmas with cookies and pies, Superbowl is incomplete without wings, chilli, nachos, burgers and chips n dips.


I am seriously tempted to do a superbowl series of recipe. However, if I am to do that, it will call for my family to eat Superbowl food for a week, which by no means will the cardiologist approves. Let's start with the wings and we will figure the rest out later.

The usual wings served during a Superbowl party will be buffalo wings. However, I came up with this easy delicious healthy wing recipes, baked and not fried. They are just as good and better for you too.


Superbowl Wings recipe
(serves 6-8 as an appetizer)

Ingredients
3lb wings (about 1.5kg), sectioned
2 recipe of brine
2 recipe of seasoning
4 tablespoon of olive oil

Directions
1. Brine the sectioned chicken wings for 2 hours in the refrigerator
2. Prepare two baking sheets. Grease generously with 2 tablespoon of olive oil on each sheet.
3. Drain the wings from the brine. Pat dry with paper towel.
4. Preheat oven to 400F (about 200C). Arrange wings, skin side down on baking sheet in a single layer.
5. Sprinkle with seasoning liberally to coat wings.
6. Bake for 25 mins, turning wings once halfway.
7. If you have the speed bake or convection oven option, turn it on in the last 10 minutes of baking time to crisp up the skin. If you don't, let the wings cooked for the full 25 mins. Pull it out. Turn the broiler to low. Broil it for 3-5 mins to crisp up the skin. Keep an eye on the browning process as not to burn wings.
8. Served with blue cheese dressing, celery and carrots or your favorite hot sauce.


Tuesday, February 1, 2011

Happy Chinese New Year!

To all my Asian friends,

Happy Chinese New Year! Wishing you all the best and a prosperous bunny year.

BTW, I am making green bean pastry, tau sar pneah. Will do an elaborate post on it later.

Love,
The Editor