Showing posts with label fruit. Show all posts

Saturday, April 21, 2012

Homemade Strawberry Preserves

Yes, it has been a while since the last I put up a post on this blog. Life has been busy in general, which is great. Strawberries are in season now and for those of you who do not know it, I am a huge strawberry fanatic. I love the look of it, the color, the shape, the smell, and most important of all, the taste. Good strawberries are hard to come by, and I am speaking of those naturally juice and sweet ones. Some of them are just so bland that I usually feed it to the dog.
But I can't possibly give her that many strawberries without risking her overactive bowel movements which will cause some gross and unhappy incidents in the house. The poor rug. Strawberry preserves seems to be the perfect solution and boy, I can kick myself in the ass for not attempting to make homemade preserve before. I found a super easy recipe, alter the sugar level to suit my taste, and voila......perfection in a container.
But before you embark on your preserve making journey, let me give you a fair warning about making preserves. A pound of berries yield only about 500ml of preserve. If strawberry is expensive where you are, forget about making your own and just buy a good brand jar. However, if you live in a place where berries are cheap, like yours truly, then go ahead and embark on a preserve discovery journey. It may not be easy but it is definitely delicious!

Homemade Strawberry Preserve
Ingredients
1lb strawberries, cleaned and stemmed
3/4 cup of sugar
Juice of 1/2 lemon

Directions
1. In a heavy bottom sauce pan, mashed strawberries in batches. You can mashed it as fine as you like or leave it slightly chunky like I did.
2. Add in the sugar and lemon juice. Cook on low till sugar has fully dissolved. Stir occasionally.
3. Once sugar has fully dissolved, turn heat up to high. Continue cooking the berry mix till it comes up to a rolling boil. You are aiming for 220F on a candy thermometer. If you don't have one, cook the strawberry preserve till you can no longer see pink foam on the surface of the mix and then let it boil for another 5 minutes. Keep stirring to avoid preserve from sticking to the bottom of the pan.
4. Let cool before storing in a clean glass jar. You can process the jar for canning if you plan to keep this for a while. If you are consuming it immediately, just store it in your favorite jar, let cool completely before putting it in the fridge.
I usually served them with homemade NY-style bagels. Seems like a lot of work but it is a great weekend treat. Bagels with cream cheese and homemade preserve. 

Sunday, July 17, 2011

Blueberry Tower Muffins

  
Starting a new job soon and will not have as much time to bake as I would like. Oh well, there is always the weekends except that next weekend is all filled up with projects and wedding. Don't you just love summer? Speaking of, what is summer without the berries and blueberries at that. Love those tiny pearls of yumminess especially when transformed into Blueberry Tower Muffins. Its namesake probably explain everything. These muffins rise so high, hence, tower. I love the light airy texture of the muffins compared to the other denser versions of muffins. Sorry, no step-by-step pictures this time cos I have forgotten to snap any while I was making them.

Blueberry Tower Muffins
(Adapted from Boston Globe)
Ingredients
2 1/2 cups flour
1/2 cup sugar
1 tablespoon baking powder
1/2 teaspoon salt
1 1/2 cups blueberries
2 eggs, well beaten
3 tablespoons melted butter
1 cup milk


Directions

Step 1: Mix or sift together the flour, sugar, baking powder and salt. Mix
berries with 1/4 cup of this mixture and set aside.
Step 2: Beat eggs with melted butter, then add rest of mixture and milk. Mix in blueberries
lightly and stir until well blended.
Step 3: Place muffin liners in muffin tins and fill halfway. Bake at 350 for 25 minutes or until done.

Makes 18 muffins.

Monday, June 20, 2011

Feel Good Bumble Berry Pie

When the world gives you that sinking feeling in your stomach and you feel everything looks bleak or bland, bake a pie. Seriously, who doesn't smile at the sight and smell of a freshly baked pie?


I had my first taste of Bumble Berry pie during our family vacation in Maine. The combination of fresh berries and flaky pie crust won us over and we instantly fell in love with it. Aside from the lure of the berries, the most important part was the reminder of what a great time we had during our vacation. The reminder of summer and good times, priceless!


Making berry pie is not as complicated as it seems, that is if you know the ingredients you are working with well enough. The trick to making a good berry pie is one's ability to ensure the juices of the pie is well within control. If you have any experience baking with fruit, then you will know the headache and heartache involved when the juices released by the baked fruit threatened to overflow from the pastry casing and ruined the entire pastry. Adding to much starch into the filling will result in a gluey pie filling while not adding enough......a flood of berry juices will ooze out and drown that poor pie.


Striking a balance to reach the nirvana state of the pie filling can be complicated. However, if you have done enough research on fruit pie recipes, you have probably get enough tips and tricks to achieve the fruit pie perfection that we novice bakers are striving so hard to achieve. Please share your experience here with me and I promise I will spread the word of your expertise.


What is your feel good food that you will make to brighten everyone's day?

Feel Good Bumble Berry Pie
(Makes one 10-inch double crust pie)

Ingredients


For the pie crust
2 2/3 cup all purpose flour
1 tsp salt
1 cup shortening
7-8 Tbsp cold water

For the filling
5 cups or 40oz of mixed berries, fresh or frozen (strawberries, raspberry, blueberries, blackberries)
1 cup sugar
1/2 cup all purpose flour
1/4 tsp salt
1/2 cup plain breadcrumbs
Zest of 1/2 lemon (optional)
2 Tbsp of milk, for glazing

Directions
Step 1: Make the pie crust. Combine salt and flour in a large bowl. Cut in the shortening with a pastry cutter till it resembles coarse breadcrumbs.

Step 2: Once the desired consistency is achieved, add in the cold water. Start by adding 7 tablespoons of cold water.

Step 3: Mix the flour well. Add another tablespoon of water if it feels dry. Gather all the dough together and form it into a ball.

Step 4: Divide the dough into two disks. Wrap with plastic and let rest in the refrigerator for 30mins.

Step 5: Once dough is well rested, begin with one disk of dough to form bottom pie crust. Preheat the oven to 425F.

Step 6: In between two sheets of wax paper, roll dough out to about 12-inch in diameter.

Step 7: Peel wax paper gently away from dough. Fit dough into pie plate to fit snugly by gently pressing dough into pie plate. Sprinkle 1/4 cup of breadcrumbs onto pie crust.

Step 8: In a large bowl, combine berries, flour, sugar, salt and lemon zest. Mix well to combine.

Step 9: Place berries, flour and sugar mix onto pie crust.

Step 10: Roll out the other disk of pie dough into a 12-inch diameter. Cover pie. Trim the sides, leaving a 1-inch overhang. Tug the pie dough underneath the bottom pie crust. Seal by applying slight pressure or crimp with the back of a fork.

Step 11: Place rack on the lower third rack. Bake pie at 425F for 30 mins. Reduce heat to 375F and continued to bake for an additional 30 mins.

Step 12: Remove pie from the oven. Let cool to room temperature before refrigerate.

Step 13: Serve pie with a scoop of vanilla ice-cream.


Tuesday, June 14, 2011

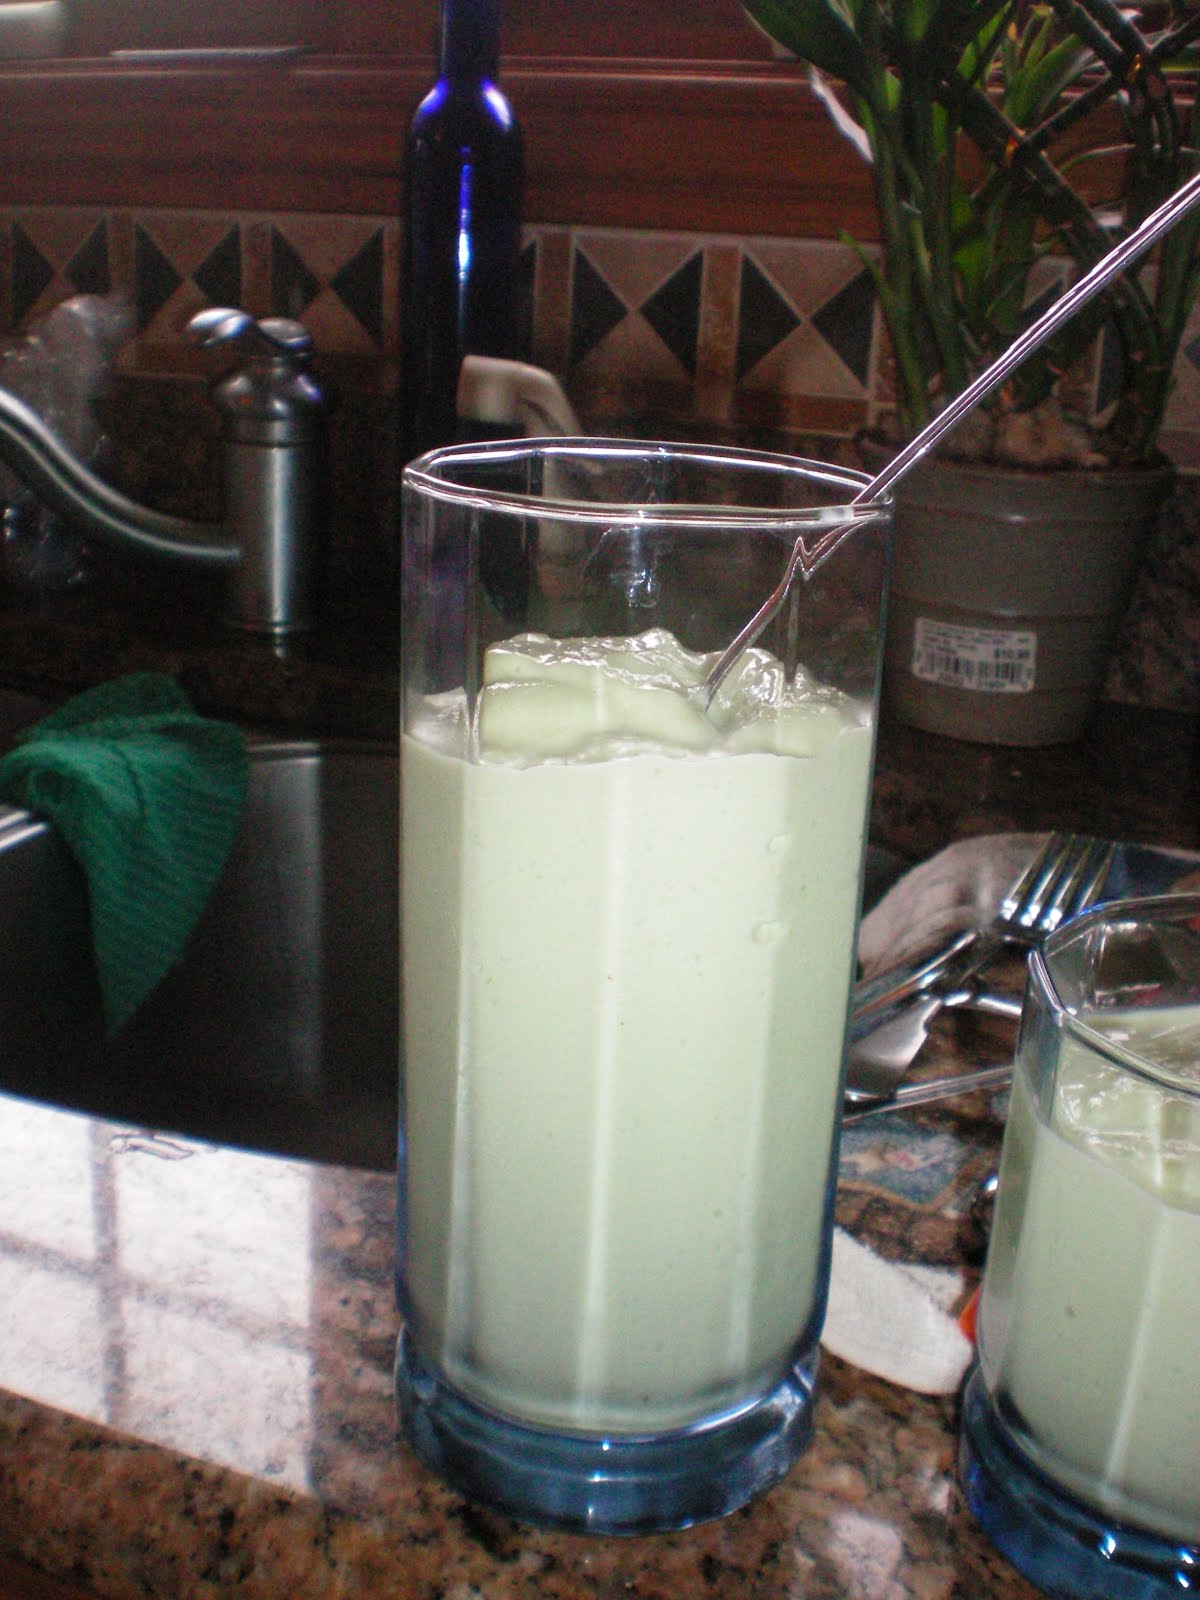
Avocado Milk Shake (Shin To Bo or Es Alpukat)

I had my first taste of Avocado Milkshake on a trip years ago to Surabaya in Indonesia. When we moved here to the States, the popular Banh Mi joint in Chinatown sells the Vietnamese Avocado Milkshake or Shin To Bo. I have been a huge fan ever since my first taste of Es Alpukat in Indonesia but always limit my consumption of the dangerously addictive milkshake as it is a calorie nightmare for everyone. Which is why I still could not understand people who drinks smoothie whilst on a diet. I guess whatever works for them.

The difference between the Vietnamese Avocado Milkshake and the Indonesian's Es Alpukat is the addition of chocolate syrup into the glass before pouring in the avocado shake. I have had version of Es Alpukat in Indonesia where the vendor used vanilla ice-cream to make the concoction instead of just regular sweetened condensed milk and ice. However way you decide to make this, all I can say is, it is the perfect drink in the summer weather.

Avocado Milkshake
(Serves 3-4, really)

Ingredients
1 medium ripe avocado
6 Tbsp sweetened condensed milk
1 cup of ice
1/3 cup of whole milk
Chocolate syrup (optional)

Directions

Step 1: Remove the seed and skin of an avocado. Place avocado inside a blender.

Step 2: Mix in sweetened condensed milk and whole milk.

Step 3: Add in the ice cubes. Pulverize till smoothie is thick and smooth.

Serve as is or swirl a tall glass with chocolate syrup before adding in the avocado milkshake to make es alpukat.

Friday, March 18, 2011

20 Layer Lemon Crepe Cake


Why would someone attempt to make a 20-Layer crepe cake, you ask?

I was watching the show, Diners, Drive-Ins and Dives on Food Network Monday night. The host went to this one restaurant in the Midwest and one of the item featured on the show was a Layered Crepe Cake. Now, I have had my fair share of layered crepe cake before, the first time was in Osaka, Japan back in 2007. I went for my university exchange program to the land of the rising sun at the time and went up north for a holiday with my best friend. By the way, speaking of Japan, please help the Tsunami's victims. You can make your donation here at the American Red Cross website or your country's red cross website.

So, when the cake was featured on the show last Monday, I know I have to attempt to re-create the cake at home. After all, it is only a matter of stacking 20 crepes together, right? How hard can it be? I was dead wrong. To be fair, the assembly process wasn't difficult at all. The tedious part is to getting your crepe to come out right especially if you do not have a crepe pan. I tried using my non-stick pan. The first one was frustrating as it keeps getting stuck in the middle of the pan. I ended up tossing the pan into the trash.

Using my new small omelet pan, I finally managed to get the crepe to come out fine. Then, it was the patience involved to make 20 crepes. It sounded easy during the planning process. Implementation wise, well, let's just say you need quite a bit of zen in the kitchen when you are doing it. As usual, I believe practice makes perfect.

As if that wasn't enough, I have to tweak the recipe, as usual. Instead of using regular pastry cream, I decided to make lemon curd and fold it in fresh whipped cream. Mom loves lemon curd. And I love lemon for the fact that it adds a lot of fresh flavor to anything bake or cook. The end result is worth all the work. I am already planning on a second crepe cake, most likely a berry filled crepe cake. Will probably have that in the menu this coming Easter and also for Mother's Day!

Happy crepe-ing!

20 Layer Lemon Crepe Cake
Ingredients

Basic Crepe Batter
1 1/2 cup all purpose flour
6 large eggs
1 tsp vanilla
1/4 tsp salt
7 Tbsp sugar
6 Tbsp brown butter
 3 cups of milk

Lemon Curd
(Adapted from Joy Of Baking)
3 large eggs
1/3 cup lemon juice (2-3 lemons)
1 tablespoon of lemon zest
3/4 cup of sugar
4 Tbsp of unsalted butter


To Assemble
2 Cups Whipping Cream
1 Tbsp sugar
Powdered Sugar for dusting

Directions

Step 1: Prepare the crepe batter. Measure out all the dry ingredients in a bowl. Melt the butter in a small pan till it is lightly brown. Set aside. Bring the 3 cups of milk to a simmer. Set aside.

Step 2: Add in 6 eggs and 1 tsp vanilla in the bowl with the dry ingredients. Beat with a mixer till it is well combined.
Step 3: Add in the milk and brown butter. Beat till well mix.
Step 4: Strain batter into an airtight container. Place batter in the fridge for at least 2 hours, preferably overnight

Step 5: Prepare lemon curd according to the direction here. Store in an airtight container and let chill in the fridge overnight.

Step 6: The next day, prepare the crepe. Pull the container out from the fridge. Let it rest till it comes to room temperature. Whisk batter before using.

Step 7: Heat a pan over low heat. Brush some melted butter on the pan. Once the pan gets warm, not smoky, pour about 3 tablespoon of batter onto the pan. Swirl to cover.
Step 8: Let crepe cook for a min. Flip crepe over carefully with a spatula. Let cook for another 30 seconds.

Step 9: Remove and lay crepe on a baking sheet layered with parchment. Do not lay crepe on top each other. Layer with parchment. Continue till all batter has been used.

Step 10: To assemble, whipped the 2 cups of whipping cream with 1 tablespoon of sugar till soft peak forms.
Step 11: Fold in lemon curd into the whipped cream.
Step 12: Begin by placing the first crepe onto a plate lined with plastic wrap.
Step 13: Spread a tablespoon of lemon cream onto the crepe.

Step 14: Top with another crepe. Repeat the process till you have used up all the crepe and cream, with the last crepe on top.
Step 15: Wrap crepe cake with plastic wrap. Chill for at least 2 hours, preferably overnight.
Step 17: Dust with icing sugar and serve.


Tuesday, March 8, 2011

Dreamy Banana Cream Pie


Banana Cream Pie is one of those indulgence worthy dessert that leaves a smile on your face without doing much damage to your diet, that's it if you stick to a slice. So, it all begins with a bunch of ripe bananas sitting on the kitchen counter. For some reason, I do not feel the urge to bake any banana bread today. Banana Cream Pie, on the other hand, is something that I don't make too often. In fact, my first banana cream pie endeavour was Christmas last year which received some mix reviews from family and friends.

Armed with the comments I received last year, I was eager to find the recipe with the perfect balance of everything...a banana cream pie worthy of its name. In come the recipe from the home diva, Martha Stewart. Now, it is my first time trying out a recipe from Martha Stewart's online recipe collection. I made a few adjustments though, as usual. Instead of using her pie crust recipe which called for a pate brisee, I used our family go to Betty Crocker's pie crust recipe. Mom has used the recipe since she first started making apple pies some years ago and that is still the only pie crust recipe that she likes. Also, the addition of vanilla in the custard filling gives it a nice flavor while enhancing the taste of the bananas. I just love banana and vanilla together. This pie is so easy to make that the only difficult part is to wait for it to get cold enough before serving.

Banana Cream Pie
(Serves 8)

For the Pie Crust
(Makes 1 9-inch single crust)
1 cup flour
1/2 tsp salt
1/3 cup plus 1 Tbsp shortening
2-3 Tbsp cold water

For the Custard
(Adapted from Martha Stewart's recipe )
4 large egg yolks
2 cups whole milk
1/2 cup sugar
1/4 cup cornstarch
1/4 tsp salt
2 Tbsp cold butter
1 tsp vanilla

For the Whipped Cream
1 cup heavy whipping cream
1 tsp vanilla
1 Tbsp sugar

3 medium size banana, sliced

Directions

Step 1: Preheat oven to 475 F or 246C. Make the pie crust. Combine the flour, salt and shortening by using a pastry cutter, food processor or your hand. Please be sure to work fast if using your hand. Overworking the dough will result in tough pie crust. Sprinkle water over the pie crust mix. Gather all the dough and mold it into a ball as you will make a snowball.

Step 2: Flatten into a disk. Wrap in a cling wrap and let sit in the refrigerator for 15 minutes.

Step 3: In between two sheets of wax paper, roll out the pie crust to 12-inch diameter.

Step 4: Peel off one side of the wax paper. Carefully, transfer the pie crust to the pie plate. Lay pie crust gently onto plate. Peel off the other side of the wax paper. Press pie crust gently onto the bottom and side of plate to fit.

Step 5: Crimp the edges of pie, by either using the flute method or with the back of a fork. Trim off excess, if necessary.
Step 6: Dork the pie crust using a fork to avoid crust from puffing up during the baking process.

Step 7: Cut a sheet of parchment paper to fit onto pie crust. Press parchment gently onto crust.

Step 8: Fill with rice or beans. This is refer to as the blind baking process. The weight will help keep the crust from puffing up.

Step 9: Bake for 15-17 minutes till the edges are slightly golden brown. Avoid the temptation to overbake. You do not want a hard pie crust. Remove the parchment and rice. Discard the rice or beans used. It is no longer good for cooking. Alternately, store the rice or bean to be used in the next blind baking process. Rest pie crust on a wire rack to let cool.

Step 10: Prepare the custard filling. In a saucepan, bring 2 cups of whole milk to a simmer over medium heat.

Step 11: While waiting for milk to come up to a simmer, combine sugar, cornstarch, egg yolks and salt in a large bowl. Whisk till smooth. Once milk begins to simmer, pour half cup of milk to egg mix in a slow steady stream while whisking vigorously. Return egg mix to saucepan and cook over medium heat till custard is thick, about 2 mins. Whisk constantly. 
Step 12: Pour custard through a medium fine mesh strainer to smooth out any lumps. Stir in vanilla and butter. Make sure butter is all melted into the custard.

Step 13: To assemble, place 3 Tbsp of custard at the bottom of the crust.
Top with banana slices.

Spread remainder custard on top of banana to cover. Cover pie with a plastic wrap. Press plastic wrap onto custard surface to avoid skin from forming. Let cool in the refrigerator for at least 3 hours before serving.

Step 14: Prepare whipped cream topping right before serving. Combine whipping cream and sugar in a bowl. Using a hand beater, start beating cream on low speed until mixture thickens. Add in vanilla and continue to beat whipped cream until hard peaks formed, about 3 mins. Top banana cream pie with whipped cream.
Optional: You can skip this step all together. Use a good store bought whipped cream as topping.