Showing posts with label Cake. Show all posts

Monday, February 6, 2012

Simplicity At Its Best - Marble Pound Cake

I love to bake cakes. Any cakes, any recipes from scratch. It gives me endless amount of joy when my cake comes out looking and tasting great. Too often, cake recipes being featured on Websites deal with copious amount of ingredients and it makes me wonder, "What is wrong with a simple cake?"

Marble pound cake may be a simple recipe but it is one that is difficult to master. I have baked endless number of pound cakes till now and often, the cakes came out dry with coarse textures. which I detest. Then, a friend of mine tagged a picture of marble pound cake she baked and it was love at first sight for me. The cake has the fine, crumbly texture I have been looking for and she was generous enough to share the recipe with me.

This recipe she has is from the mother-in-law of a friend, who has had the recipe for ages now. I love nothing better than old recipes. It produces no frill, simple and buttery perfection every time. It reminds me of the marble pound cake one can find in the old school Hainanese Kopitiam in Malaysia. Give this a try.
Marble Pound Cake
(Makes 1 9-inch pound cake)
Ingredients
12 oz butter, softened (preferably European butter)
9 oz sugar
9 oz all purpose flour
8 large eggs, separated
1 1/2 tsp baking powder
1/4 tsp salt
2 Tbsp cocoa powder
1 tsp vanilla essence (optional)

Methods
1. Preheat oven to 170C/340F. Line a 9-inch cake pan with parchment paper.
2. In a bowl, cream butter till light and fluffy. Add in sugar and beat till well incorporated.
3. Beat in the egg yolks, one at a time till well incorporated. Mix in the vanilla, if using.
4. In another bowl, combine flour, salt and baking powder. Mix well. Add into the butter-sugar-egg yolk mix till fully incorporated. The batter should be really thick at this point.
5. In a clear bowl, whisk egg whites till stiff, about 10 minutes. You should do in  mixer, trust me.
6. Fold in egg whites into cake batter gently. Do not overmix.
7. Scoop out about 1/4 of cake batter into a separate bowl. Add in the 2 Tbsp of cocoa powder and mix well.
8. Layer the cake batter into prepared pan. Using a fork or skewer, gently make swirls to create marble effect.
9. Bake in oven for 50-60 minutes. Start checking at 50 minutes.
10. Let cake cool for 10 minutes on a wire rack before removing. Let cool completely before slicing. Best serve with a hot cup of coffee or tea.


Wednesday, May 25, 2011

Lemon Tea Cakes

I saw this recipe on Mary's One Perfect Bite website and I can't help myself but to make it immediately. The way she described this light lemony petite cakes bursting with citrus flavor had me go gaga over the concoction. Yes, I am a lemon head. I always have lemons on hand, will usually get a couple of fresh lemons and a few lime when I go to the store. It is good to love lemon!

Lemon Tea Cakes
( Adapted from One Perfect Bite)
Makes 20-24 small cakes

Ingredients

2 cups all purpose flour
2 1/2 tsp baking powder
1/4 tsp salt
2/3 cup unsalted butter, softened
1 cup sugar
3 large eggs
2/3 cup whole milk
Zest from 1 lemon
1/4 tsp vanilla (optional)

Glaze: Combine 1/3 cup of fresh lemon juice and 2/3 cup of sugar

Directions
Step 1: Combine flour, baking powder and salt in a bowl. Mix well. Set aside. Preheat oven to 350F or 176C.

Step 2: Greased and floured 2- 12 cups muffin tins.

Step3: Beat the softened butter till light and fluffy.

Step 3: Add in 1 cup of sugar and continue to beat till light and well combined.

Step 4: Beat in 1 egg at a time. Make sure eggs are well incorporated into mix after each addition. Add in the vanilla now, if using.

Step 5: Add in flour to mix in 3 batches. Start with the first batch of flour. Mix on low till it is well incorporated.

Step 6: Alternate with milk in 2 batches. This will make it easier to incorporate all the flour into the cake batter. Scrape the side of the bowl occasionally. Fold the lemon zest into the cake batter.

Step 7: Once batter is prepared, spoon batter into muffin tins about 2/3 full. You will get between 20 and 24 cakes. Bake for 20-25 minutes till a toothpick inserted into the center of cake comes out clean. It takes me 20 minutes to bake the cakes. Let cake cool in muffin tin on wire rack for 5 minutes.

Step 8: Meanwhile, prepare the glaze by combining 1/3 cup fresh lemon juice with 2/3 cup of sugar. Mix to combine.

Step 9: Place a wire rack onto a baking sheet lined with wax or parchment paper. Remove the cakes from the muffin tins, placing them upside down. Glaze the cakes while it is still hot. Use all the lemon glaze. Let cool for another 5 minutes and serve with coffee or tea.

Updates: The Lemon Tea Cakes are all gone within 2 days. That is a first in this house. That goes to show how good this cakes are.

Thursday, March 24, 2011

Yellow Butter Cake

It all happened out of the blue, I had a hankering for butter pound cake. Not just any pound cake but the type you find in the old school Hainanese Kopitiam, the individually wrapped wedges that they placed on each table, with chocolate swirl in the center.

As if Aunt Lily, from Lily 's Wai Sek Hong can read my mind, she posted a recipe for a yellow butter cake on her website. According to her recipe, she recommended the use of European-style butter, which gives the cake a better flavor due to its higher fat content. She has also recommended the use of potato starch instead of just all purpose flour as it adds moisture to the cake.

The result was one good buttery tasting cake. It is nothing like the yellow pound cake in the Hainanese Kopitiam which I had in mind. However, Aunt Lily's yellow butter cake is very light and moist, with extremely fine crumbs that will not weight you down after you ate one. I would say it is way better than any boxed yellow cake mix you can buy at the grocery store. It is definitely a good recipe to be used as a base cake whenever a recipe called for yellow butter cake. I baked mine in mini loaf pan, as everyone in the family likes more golden brown sides to their cakes rather than the conventional 9 or 10-inch round cake pan.

I think this will be the cake base I will use from now on when making my Lemon Curd Layer Cake. I absolutely love the light and moist texture of the cake plus the buttery flavor. I am definitely in buttery yellow cake heaven. Thanks, Aunt Lily!

Yellow Butter Cake
(Adapted from Lily's Wai Sek Hong)


Ingredients
6 3/4 oz or 1 1/2 cups all-purpose flour
2 ozs or 1/2 cup potato starch
1 1/2 tsp baking powder
1 tsp salt
1 cup fine granulated sugar(add more if you like a sweeter cake - max another 3/4 cups)
6 ozs or 10 tbsp European-Style butter - softened
3 large eggs
3/4 cup whole milk
1/4 cup half-and-half
2 tbsp bourbon (optional)
1 tbsp vanilla extract

Directions
Step 1: Prepare the pan. Grease pan well with butter. Preheat oven to 350F.
Step 2: Weigh out softened butter into a large mixing bowl. I am only doing half the recipe. You should be using more butter than shown above.
Step 3: Weigh out all the dry ingredients and sift into a bowl.
Step 4: Have all the wet ingredients ready.
Step 5: Using a hand or stand mixer, begin by creaming butter with sugar till it is light and fluffy. Add in eggs and vanilla. Beat till well combined.
Step 6: Divide flour into three portions. You can just use approximation. Add first portion to mix with half the milk and half&half. Beat till combined. Repeat with flour and milk, ending with flour.

Step 7: You should get a smooth batter like this.

Step 8: Spoon batter into 2 9-inch round cake pan or 2 mini 8-loaf pan. If using 9-inch cake pan, the baking time will be 28 minutes. If using mini loaf pan, the baking time will be around 25 minutes.


 Have a cup of tea ready. You will want to savor the cake with a perfect cup of English breakfast or earl grey tea.

Friday, March 18, 2011

20 Layer Lemon Crepe Cake


Why would someone attempt to make a 20-Layer crepe cake, you ask?

I was watching the show, Diners, Drive-Ins and Dives on Food Network Monday night. The host went to this one restaurant in the Midwest and one of the item featured on the show was a Layered Crepe Cake. Now, I have had my fair share of layered crepe cake before, the first time was in Osaka, Japan back in 2007. I went for my university exchange program to the land of the rising sun at the time and went up north for a holiday with my best friend. By the way, speaking of Japan, please help the Tsunami's victims. You can make your donation here at the American Red Cross website or your country's red cross website.

So, when the cake was featured on the show last Monday, I know I have to attempt to re-create the cake at home. After all, it is only a matter of stacking 20 crepes together, right? How hard can it be? I was dead wrong. To be fair, the assembly process wasn't difficult at all. The tedious part is to getting your crepe to come out right especially if you do not have a crepe pan. I tried using my non-stick pan. The first one was frustrating as it keeps getting stuck in the middle of the pan. I ended up tossing the pan into the trash.

Using my new small omelet pan, I finally managed to get the crepe to come out fine. Then, it was the patience involved to make 20 crepes. It sounded easy during the planning process. Implementation wise, well, let's just say you need quite a bit of zen in the kitchen when you are doing it. As usual, I believe practice makes perfect.

As if that wasn't enough, I have to tweak the recipe, as usual. Instead of using regular pastry cream, I decided to make lemon curd and fold it in fresh whipped cream. Mom loves lemon curd. And I love lemon for the fact that it adds a lot of fresh flavor to anything bake or cook. The end result is worth all the work. I am already planning on a second crepe cake, most likely a berry filled crepe cake. Will probably have that in the menu this coming Easter and also for Mother's Day!

Happy crepe-ing!

20 Layer Lemon Crepe Cake
Ingredients

Basic Crepe Batter
1 1/2 cup all purpose flour
6 large eggs
1 tsp vanilla
1/4 tsp salt
7 Tbsp sugar
6 Tbsp brown butter
 3 cups of milk

Lemon Curd
(Adapted from Joy Of Baking)
3 large eggs
1/3 cup lemon juice (2-3 lemons)
1 tablespoon of lemon zest
3/4 cup of sugar
4 Tbsp of unsalted butter


To Assemble
2 Cups Whipping Cream
1 Tbsp sugar
Powdered Sugar for dusting

Directions

Step 1: Prepare the crepe batter. Measure out all the dry ingredients in a bowl. Melt the butter in a small pan till it is lightly brown. Set aside. Bring the 3 cups of milk to a simmer. Set aside.

Step 2: Add in 6 eggs and 1 tsp vanilla in the bowl with the dry ingredients. Beat with a mixer till it is well combined.
Step 3: Add in the milk and brown butter. Beat till well mix.
Step 4: Strain batter into an airtight container. Place batter in the fridge for at least 2 hours, preferably overnight

Step 5: Prepare lemon curd according to the direction here. Store in an airtight container and let chill in the fridge overnight.

Step 6: The next day, prepare the crepe. Pull the container out from the fridge. Let it rest till it comes to room temperature. Whisk batter before using.

Step 7: Heat a pan over low heat. Brush some melted butter on the pan. Once the pan gets warm, not smoky, pour about 3 tablespoon of batter onto the pan. Swirl to cover.
Step 8: Let crepe cook for a min. Flip crepe over carefully with a spatula. Let cook for another 30 seconds.

Step 9: Remove and lay crepe on a baking sheet layered with parchment. Do not lay crepe on top each other. Layer with parchment. Continue till all batter has been used.

Step 10: To assemble, whipped the 2 cups of whipping cream with 1 tablespoon of sugar till soft peak forms.
Step 11: Fold in lemon curd into the whipped cream.
Step 12: Begin by placing the first crepe onto a plate lined with plastic wrap.
Step 13: Spread a tablespoon of lemon cream onto the crepe.

Step 14: Top with another crepe. Repeat the process till you have used up all the crepe and cream, with the last crepe on top.
Step 15: Wrap crepe cake with plastic wrap. Chill for at least 2 hours, preferably overnight.
Step 17: Dust with icing sugar and serve.


Tuesday, February 8, 2011

Luscious Lemon Cake


February is a busy month in our family. Nana's birthday, Jamie's birthday followed by Emma's. I started baking cakes for them on their birthdays as I find it so much more interesting rather than driving to the bakery and buy one. I mean birthday is supposed to be a special day for the person, so how special will it be if you present them with a store-bought generic cake, right?

Nana's birthday falls in the beginning of the month. When it comes to baking a cake for Nana, it was an easy task as we all know what she likes best, LEMON! Makes me think of the song Lemon Tree.

The hard part is which lemon cake recipe to use. I admit I can be extremely picky when it comes to baking recipe I am researching for. After all, I get one good shot at it and the cake better be right when it comes out on D-Day. After researching countless websites and cookbooks, I finally settled on the one that I like best, a Lemon Layer cake recipe from Country Living. Is it me or does it seems like every cook just love doing lemon pound cake instead of a lighter lemon cake for frosting purposes.


The first sign of a good cake recipe is the ratio of dry to wet ingredients used. When I first started out baking, I have had plenty of mishaps with cake. They almost always comes out dry even though they look fabulous in the pictures posted on the website. As a rule of thumb, if the recipe calls for addition of sour cream or buttermilk, that is a good sign. You know that the cake will be moist.

Another thing I look for when contemplating a new recipe is flavor. As a rule of thumb, I am more persuaded to try a recipe that tells me to use fresh instead of bottled juices. This holds true for any recipe that uses citrus as a flavoring. Believe me, they ain't kidding when they tell you fresh tastes better than bottled.


Thirdly, the fat factor. Every now and then, I will come upon recipes which called for margarine or shortening instead of real solid butter. Now, I have nothing against margarine or shortening, having grow up on Planta margarine instead of real butter. After endless trial and error, I have this rule. Butter is for cakes and shortening is for pie crust. Not to say there is no exception to that, however, there really are few. Baking with real butter gives you a nice buttery flavor whereas replacing it with margarine produces an artificial flavor to the end product. I guess the choice is yours when it comes to deciding on the fat factor.


Last but not least, the frosting or icing for cakes. I have to admit, I have yet to have much luck when it comes to the perfect cake frosting. Thanks to my friend, Pick Yin - a pro home baker, who recently advised me to try the meringue butter cream technique, I am hopeful that in the near future, frosting will be a breeze. Meanwhile, pardon the "rustic" appearance of the cake.


Luscious Lemon Layer Cake
(Adapted from Country Living)

For the cake

Ingredients
3 cups of cake flour
1 1/2 tsp baking powder
1 tsp salt
1/2 tsp baking soda
1 cup butter, softened
2 1/2 cup sugar
5 eggs, room temperature
1/2 tsp vanilla
1/4 cup fresh lemon juice (1 whole large lemon or 2 small)
3/4 cup buttermilk

Directions
1. Preheat oven to 350F or 176C. Prepare two 9-inch cake pan. Greased and layer bottom with parchment paper.
2. In a bowl, sift together cake flour, baking powder, baking soda and salt.
3. In a large mixer or a large bowl using hand held mixer, cream butter till light and fluffy, about 5 mins.
4. Add in sugar and cream till light and fluffy.
5. Add in eggs, one at a time till well combined. Beat in vanilla.
6. Add in flour, in a third, alternating with lemon juice and buttermilk till all flour is fully incorporated.
7. Divide cake batter in half. Pour into cake pan and smooth the top with a spatula.
8. Bake for 45-50 mins till a toothpick inserts in the center comes out clean. Let cool on wire rack for 20 mins.
9. Remove cake from pan and continue to cool cake on wire rack till they are completely cool before slicing.
10. Once cake is completely cool, usually takes about 2 hours, sliced cake into 2 layers with a long serrated knife. Wrap cake in plastic wrap till ready to assemble.

Lemon Curd
(Adapted from Joy Of Baking)

Ingredients
3 large eggs
1/3 cup lemon juice (2-3 lemons)
1 tablespoon of lemon zest
3/4 cup of sugar
4 Tbsp of unsalted butter

Directions
1. In a pot, bring about 1/3 pot of water to a boil.
2. In a stainless steel bowl large enough to fit onto the pot without touching the water, combine all ingredients except for lemon zest and butter. Whisk till well combined.
3. Placed bowl over boiling water. Cook, stirring constantly till mixture reaches 160F/71C. If you do not have a candy thermometer, this will take about 10 minutes.
4. Pour through a strainer to remove lumps. Add in lemon zest. Whisk to combine. Add in butter, one tablespoon at a time. Whisk till all butter has melted.
5. Cover the top of the lemon curd by pressing a piece of plastic wrap onto the surface. Store in the fridge till cold or overnight.

Swiss Meringue Butter Cream
(Adapted from Pick Yin)


Ingredients
3 egg whites
120 gram caster sugar (fine grain)
Pinch of salt
220 gm of butter, at room temperature
1  teaspoon of vanilla

Directions:
1. Combine the egg whites, sugar and salt in a heatproof bowl over a pan of simmering water.
2.Whisk frequently, keeping it over the heat, until the mixture reaches 160°F/70°C and the sugar has dissolved (rub some between your fingers - if it feels grainy, it hasn't dissolved).
3.Transfer the mixture to a mixer with a whisk attached and beat on medium-high for 8 minutes, until stiff peaks have formed and the mixture has cooled to room temperature. 
4.Turn down the speed to medium and start adding small chunks of butter, checking that it has incorporated before adding more. 
5.Keep beating until it comes together, after about 5 minutes. 
6.Stir in the vanilla extract.
    Plan of Attack:
    Day 01: Make the lemon curd. Store in fridge in a container.
    Day 02: Make the cake. Sliced each cake into 2 layers. Wrap with plastic wrap. Store on the counter.
    Day 03: Make the butter cream and assemble the cake.
    - Begin by cutting four pieces of parchment or wax paper. Create a square with the papers on the plate, leaving the middle section empty. Place a tablespoon of lemon curd in the middle. Place the base of the cake on the platter. The curd will act as glue to hold your cake in place. 
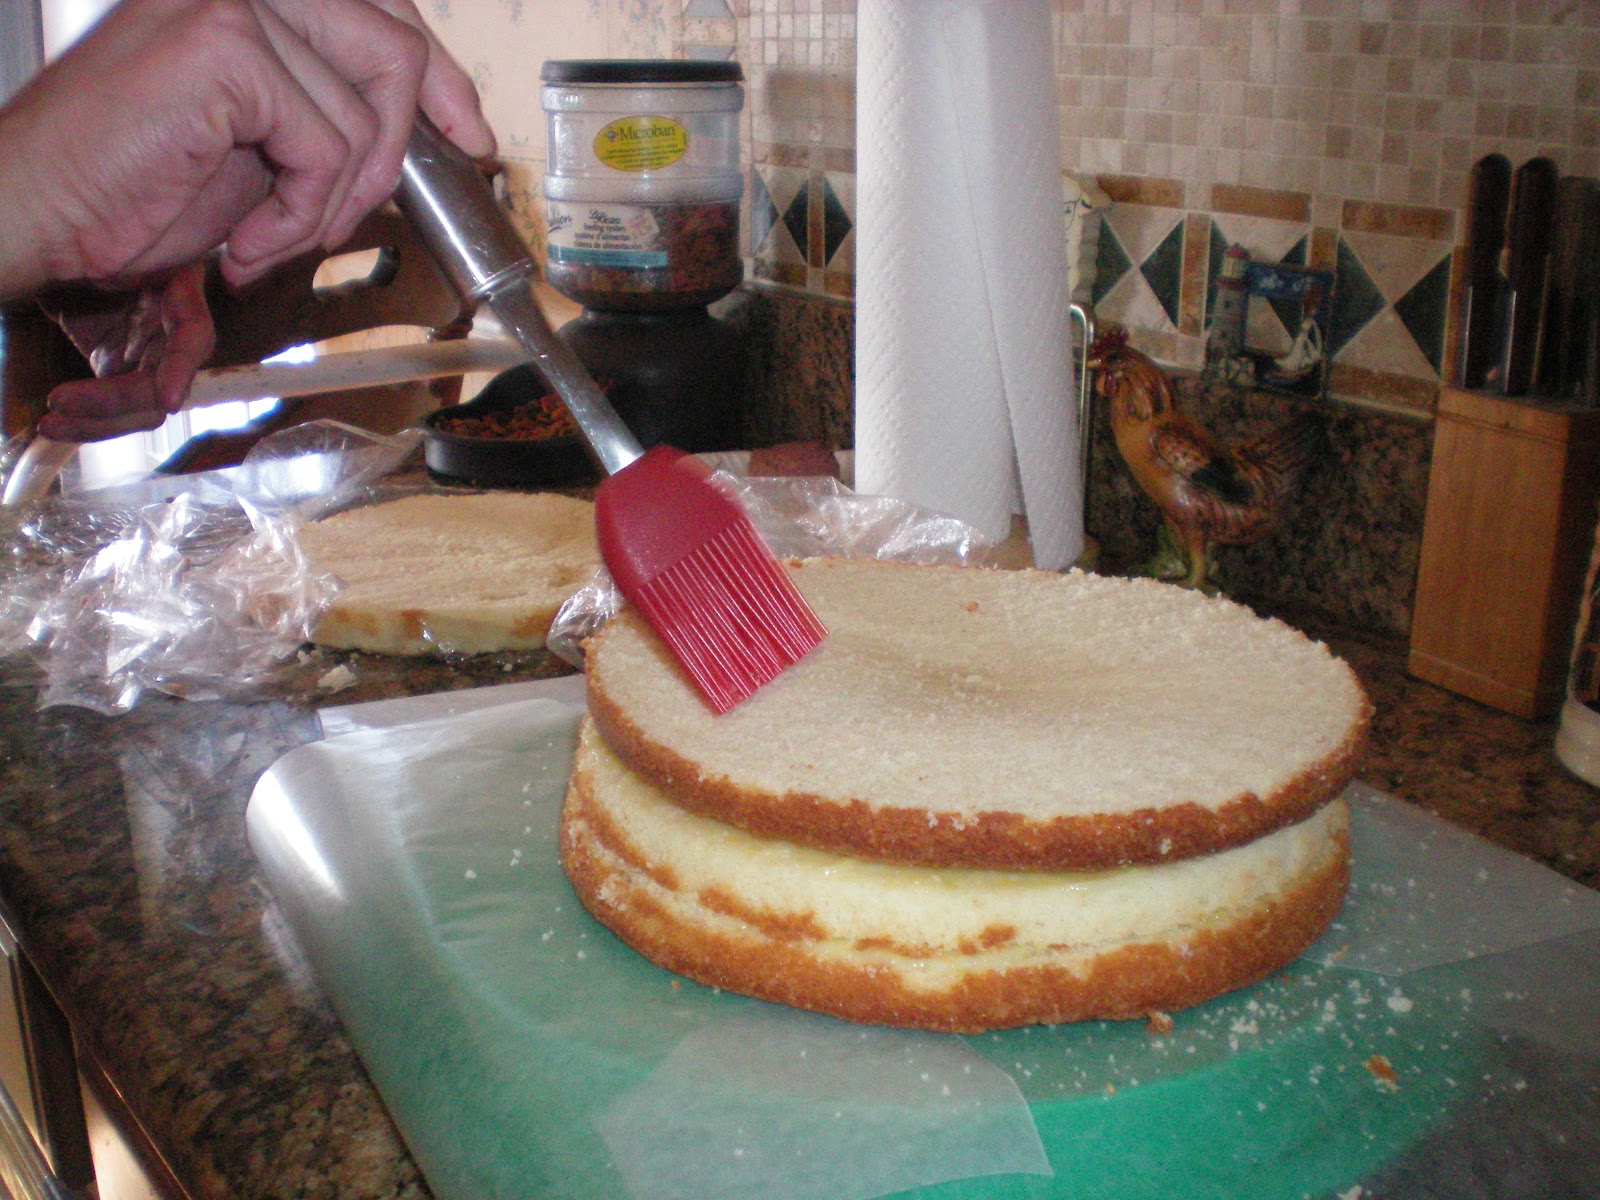
    - Brush off coarse crumbs from the cake with a silicon brush.
    - Divide lemon curd into thirds. Apply a portion of lemon curd onto cake layers. Repeat till all lemon curd is used. 
    -Make the frosting
    -Apply a thin layer of frosting all around cake, starting from the top. Let set for 5 mins.
    -Begin frosting from the top, working extra frosting onto the side of cake. Decorate by piping cream onto cake or used edible icing flowers.
    Note: I will be trying Pick Yin's icing recipe next time and see if I will have better result with my frosting.