Showing posts with label Rice. Show all posts

Saturday, December 31, 2011

Arroz Con Pollo

When the weather outside is frightful.......you start making dishes that warms you to the bone.

I have bought a box of Goya's Sazon seasoning with coriander and acchiote (annato) on impulse one day and have not do anything with it since. So I figure I will try to look for Spanish chicken and rice recipe....found one on the web which uses the Sazon seasoning. The flavor is really good which makes me wonder why it took me so long to use Sazon.

This is one of those one pot wonder meal that will make you go back for more and more. Everyone loves it and I am guessing it will be making plenty of appearance on the family's dinner table from now on.

Arroz Con Pollo
(My adaptation of Spanish Chicken with rice)


Ingredients
3lb chicken, bone-in (you can use a mix of white and dark meat or all white meat if you prefer)
2 cups of uncooked long grain rice
2 1/2 cup of chicken stock
1 Tbsp of Goya's Sazon seasoning with coriander and annato
1/2 Tbsp of ground cumin
1 tsp dried oregano
1 Tbsp tomato paste
2 squares of chicken bouillion
1 onion, chopped
1/2 large bell pepper, chopped
2 cloves garlic, chopped
2 Tbsp olive oil

Seasoning for chicken
1 tsp salt
1/2 tsp black pepper
1 tsp hot paprika
1 tsp ground cumin
1/2 Tbsp Goya's Sazon seasoning with coriander and annato

Directions


1. Make the chicken stock. You can also use store bought chicken stock. I used the bones of a whole roaster plus a bag of wing tips we collected. Add in trimmings from an onion, one garlic cloves, 1/2 tsp whole black peppercorn, scallion, 1 bay leaf, 1/2 Tbsp cumin, 1 bay leaf, and 1/2 Tbsp of Goya's Sazon seasoning. Add enough water to cover. Bring to a boil and let simmer for 1 hour.
2. Strain the chicken stock and set aside.

3. Meanwhile, chopped the onion, bell pepper, and garlic.
4. Brine the chicken for an hour or so. Pat them dry. Sprinkle seasoning mix onto chicken.
5. In a large pot, heat 2 Tbsp of olive oil. Add in chicken pieces in batches. Cook till brown, about 3-5 minutes per side.
6. Set the chicken pieces aside and finish browning the other chicken pieces.
7. In the same pot, add in onion, bell pepper, and garlic. Saute till onion is translucent. Add in rice, seasoning, oregano, cumin, and tomato paste. Stir to coat and toast rice till lightly brown.
8. Add in the chicken stock and chicken bouillon. Place chicken pieces on top of the rice mixture. Bring mixture to a boil. Cover pot and turn heat down to low. Let cook for another 25 minutes.
9. Once liquid is fully absorbed, you can add in the peas and carrots, if using. Cover pot and let it cook on low for another 5 minutes. Stir to mix all the ingredients together. Serve warm.

Monday, July 4, 2011

Indonesian Style Spicy Grilled Chicken - Ayam Panggang Padang

Padang style cooking in Indonesia refers to the Minangkabau tribe who hails from Sumatra, the island northwest of Jakarta. Why will I be interested in making Minangkabau food? Cos of rendang, their thick creamy coconut curry. I love making rendang in the winter months as it is the perfect time to make a stew like dish. However, in the summer when the outdoor grill beckons, the Padang-style grilled chicken calls my name.

The perfect accompaniment to the spicy grilled chicken will of course be coconut rice. The family loves this dish so much so that I have already been given the green light to make it a staple on dinner table as often as I want to. Nice!


Indonesian Style Spicy Grilled Chicken with Coconut Rice- Ayam Panggang Padang
Ingredients
3.5-4lb chicken, cut into quarters or 3 split chicken breast, cut in half
1 stick of cinnamon
3 pieces cloves
3 pieces kafir lime leaves
1 piece turmeric leaf
2 cups coconut milk
3 Tbsp cooking oil


Spices to grind
4 pieces chilli peppers
3 cloves garlic
4 shallots
3 pieces candlenut or walnuts
1/2 tsp whole peppercorn
1 tsp whole coriander
1/2 tsp cumin
1/2 tsp fennel
1-inch ginger
1.5 inch turmeric

Coconut Rice
1 cup uncooked rice, washed and drained
2/3 cup coconut milk
3/4 cup water
1 screwpine leaf/pandan leaf, tied in a knot
1/4 tsp salt 

Directions
Step 1: Brine chicken in water-salt-sugar mix for 2 hours. Drained and pat dry with a paper towel. Set aside.

Step 2: In a grinder, ground black pepper, coriander, fennel, cumin and walnuts to till fine.

Step 3: In a food processor, combine ground spices with chillies, garlic and shallots. Blend well and set aside.

Step 4: In a pan over low heat, combine chilli mix with cloves and cinnamon stick. Stir and let cook for 10 minutes till spices is cooked and oil is separated from the spice mix.

Step 5: Add in chicken pieces and stir to mix well. Turn heat up to medium. Cook for 20 minutes.

Step 6: Add in coconut milk. Stir to mix well.

Step 7: Cook till gravy is reduced by 1/3, about 25 minutes. Stir constantly.

Step 8: Transfer chicken and gravy to a baking pan lined with foil. Heat a grill to 450F. Turn off the center burner. Place baking pan at the center of grill. Cook till gravy has all dried up. Remove chicken from pan and place on grate directly. Grill chicken till it is lightly charred.

Step 9: Spoon remainder gravy over grilled chicken.

Step 10: To make coconut rice, combine 2/3 cup coconut milk, 3/4 cup water, salt, 1 cup uncooked rice and a pandan leaf in a pot. Bring water to a boil over medium low heat, stir occasionally to avoid burnt. Once it starts boiling, reduce heat to low. Cook over low heat for 25 minutes.

Step 11: Remove pandan leaf. Let rice sit for 10 minutes before serving. Fluff coconut rice with a fork.

Step 12: Serve chicken with coconut rice and fresh salad.


Saturday, June 11, 2011

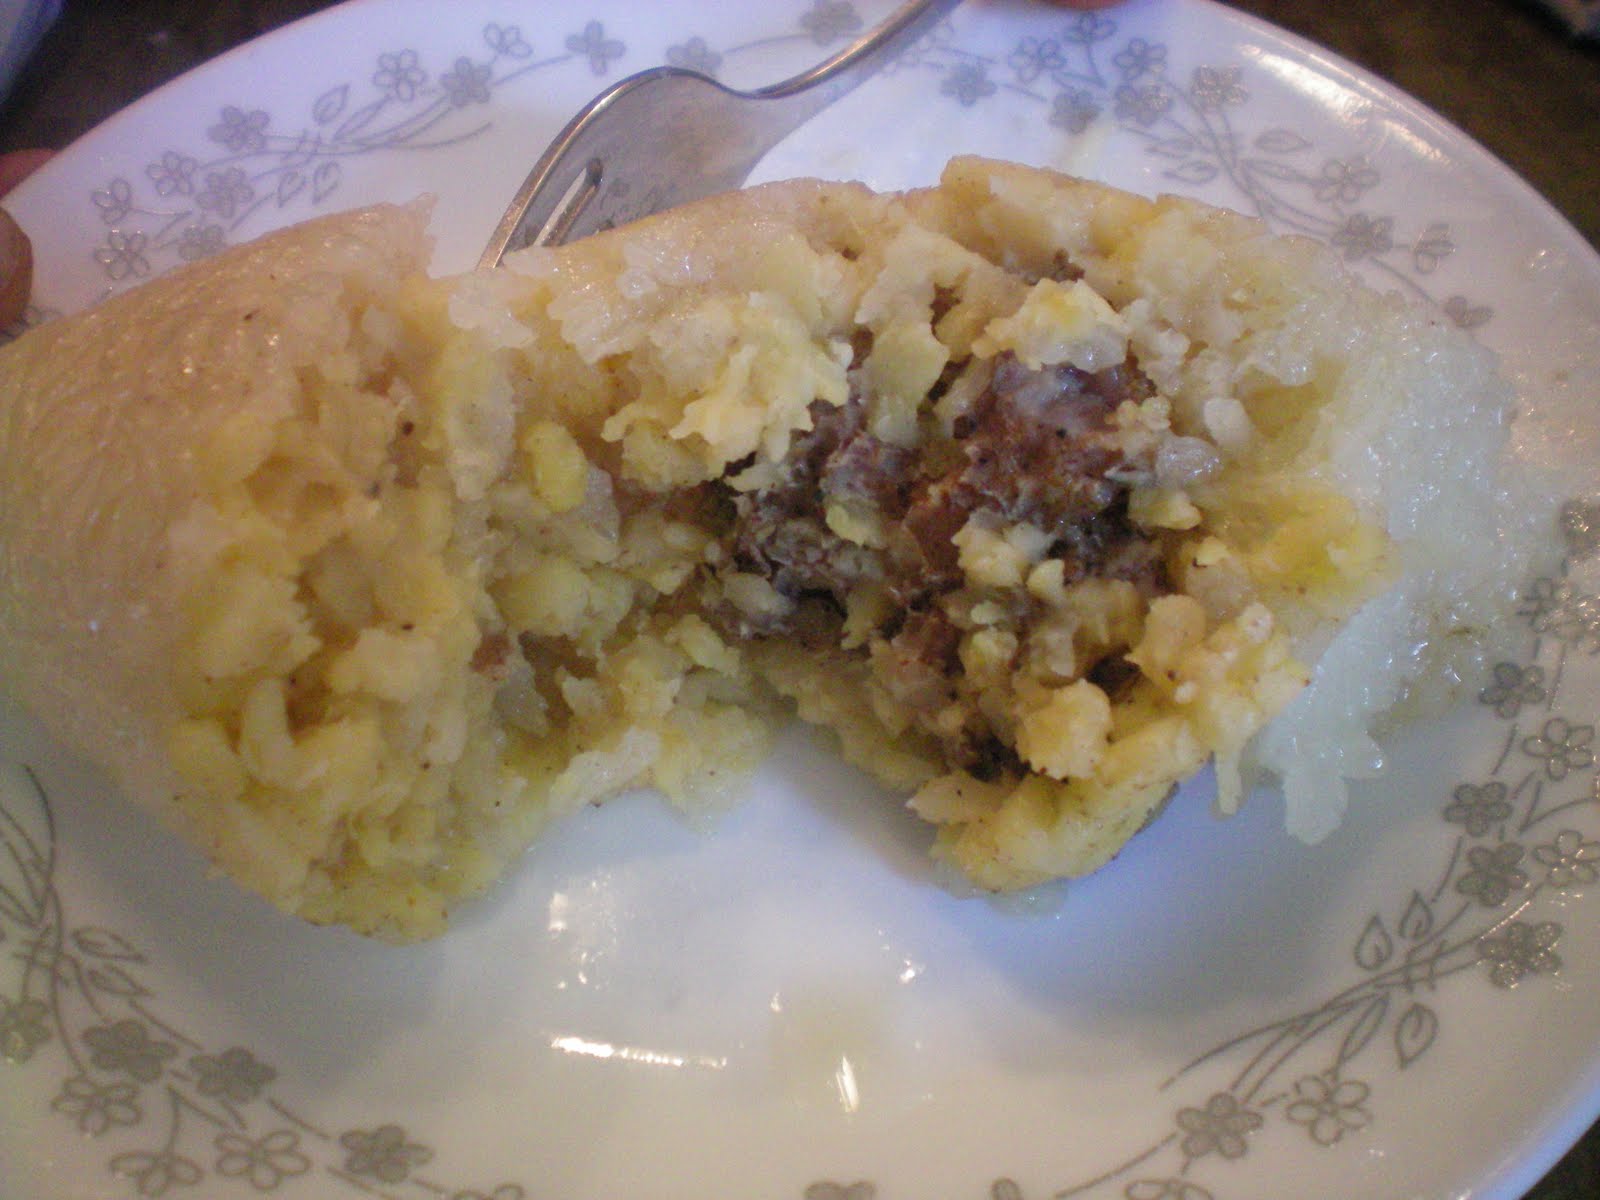
Grandma's Chinese Rice Dumpling - Bak Chang

I finally did what I thought was impossible until today, making bak chang or Chinese rice dumpling for the first time ever. The result was great although I had a 6 hour battle with the bamboo leaves wrapper for the sticky rice. Halfway through it, I wondered why can't I just go to a store in Chinatown and buy the ready made ones? As soon as I tasted the result, I can honestly said that it is so worth the 6 hours fight with the bamboo wrappers.

I was trying to replicate the dumpling made by my late grandma years ago. Honestly, her bak chang is the best. Then again, everyone will said that their grandma's version is the best! Since this is my blog, my grandma's win, hands down! No, I did not get the recipe from my grandma. However, I know I can always count on Aunt Lily's blog to post a bak chang recipe that I was looking for. And she did! Thanks, Aunt Lily!

My grandma's version used regular sticky rice, with no dark soy sauce added to the rice, unlike the ones at the store. She used green beans, pork, salted egg yolks and mushrooms for the filling. No black eyed peas, chestnut, chinese sausage or other ingredients in it. To find a version as plain as my grandma's rice dumpling is almost impossible. Yeah, there is definitely room for improvement as my dumpling wrapping skill is pretty bad. Still, the rice dumpling comes out, oh so yummy!


Grandma's Chinese Rice Dumpling
(Adapted from Lily Wai Sek Hong)
Makes about 30-35

Ingredients:
1000g glutinous rice, soaked overnight then drained, add 2 tsp salt and 1/4 cup oil.
Bamboo leaves and kitchen twine for wrapping (Soaked bamboo leaves overnight in boiling water)

Filling:

400g pork or deboned chicken meat

16 salted egg yolks, halved
150g dried mushrooms
400 g split green peas - soak overnight, drain , add 1 tsp salt, 1/2 tsp 5 spice powder and 3 tbsp of oil.

Seasoning:

For the Pork:

1 tbsp Chinese Five Spice powder
1 tbsp of light soya sauce
1 tsp salt
1 tsp sugar
1/2 tsp pepper
1 tbsp rice wine
2-3 tbsp oil

For the mushrooms:

1 tbsp light soya sauce
1 tbsp sesame oil
1 tsp sugar
1/2 tsp pepper
1 tbsp oil


Directions


Step 1: Soaked rice, green peas and bamboo leaves overnight. The next day, prepare the rice, pork, green peas and bamboo leaves as stated above.

Step 2: Have the work station ready. I have no picture for you on how to wrap the dumpling as I am a novice too. Refer to this video for guide.

Step 3: Bring a large pot of water to boil over high heat. Add 2 tsp of salt into the water. Boil dumplings for 1 1/2 to 2 hours or till cooked.

Step 4: Dish rice dumpling out of the pot onto a baking sheet lined with wire rack. Let the dumplings dripped dry before serving.

Removed wrapper and serve rice dumpling as is or with a dab of soy sauce and/or hot sauce.

Wednesday, June 8, 2011

Orzo Rice Pilaf

It is good to be on vacation and then be back from vacation although the cooking side of me do get a little rusty. Sifting through my recipe index yesterday, I noticed I have yet to post a recipe for my Orzo Rice Pilaf. How I let that recipe slipped off my blog I have no idea. I love making orzo rice pilaf as it is simple, flavorful and a great way for me to use my herbs. The nutty flavor of toasted orzo combined with vegetables, herbs and chicken stock, heavenly! By the way, my herb garden is going great. All the fresh herbs to be had in the summer, life is great!

Orzo Rice Pilaf
Ingredients
1/2 cup uncooked orzo
1/2 cup long grain or medium grain rice (please do not use minute rice)
1 1/2 cup chicken stock or water
2 Tbsp butter
1/2 onion, finely chopped
1 clove of garlic, finely chopped
2 Tbsp dried cranberries or raisins
1/2 bell pepper, diced
Fresh chives and parsley, finely chopped

Directions
Step 1: In a medium saucepan, melt the butter over low heat.

Step 2: Add in the orzo and garlic. Toast till orzo is brown. Stir occasionally to avoid orzo and garlic from burning.

Step 3: Add in the dried cranberries and onions. Continue to cook over low heat till onion has softened.

Step 4: Add in chicken stock or water. Place lid to cover pan. Turn heat up to high till water comes to a boil. Immediately, turn heat down to low and let cook for 20 minutes.

Step 5: Once water is fully absorbed, add in the diced bell pepper. Place lid on pan. Continue to cook on low for 5 additional minutes.

Step 6: Remove pan from heat. Stir in the freshly chopped chives and parsley. Let rice sit for 5 minutes before serving.

Serve orzo rice pilaf with your favorite grilled meat and vegetables.


Wednesday, May 18, 2011

Mexican Rice

Mexican Rice or Spanish Rice is the perfect condiment to go with any Mexican meal. I love the flavor of tomatoes, garlic, onion and cumin in the rice. It goes so well with Mexican food. So does re-fried beans but that is another post all together.

Mexican Rice (Serves 5-6 as a side dish)
1 cup uncooked rice
2 Tbsp olive oil
1 8-oz can diced tomatoes
1 medium onion, diced
3 cloves garlic, finely chopped
1 1/2 cups of chicken broth
2 tsp cumin
1 jalapeno, split lengthwise (optional)
3 Tbsp fresh parsley, finely chopped
salt and pepper to taste

Directions
 Step 1: Heat a deep pan over medium high heat. Add in the olive oil.

Step 2: Add in all the rice. Toast till the rice is golden brown. Stir constantly to avoid rice from burning.

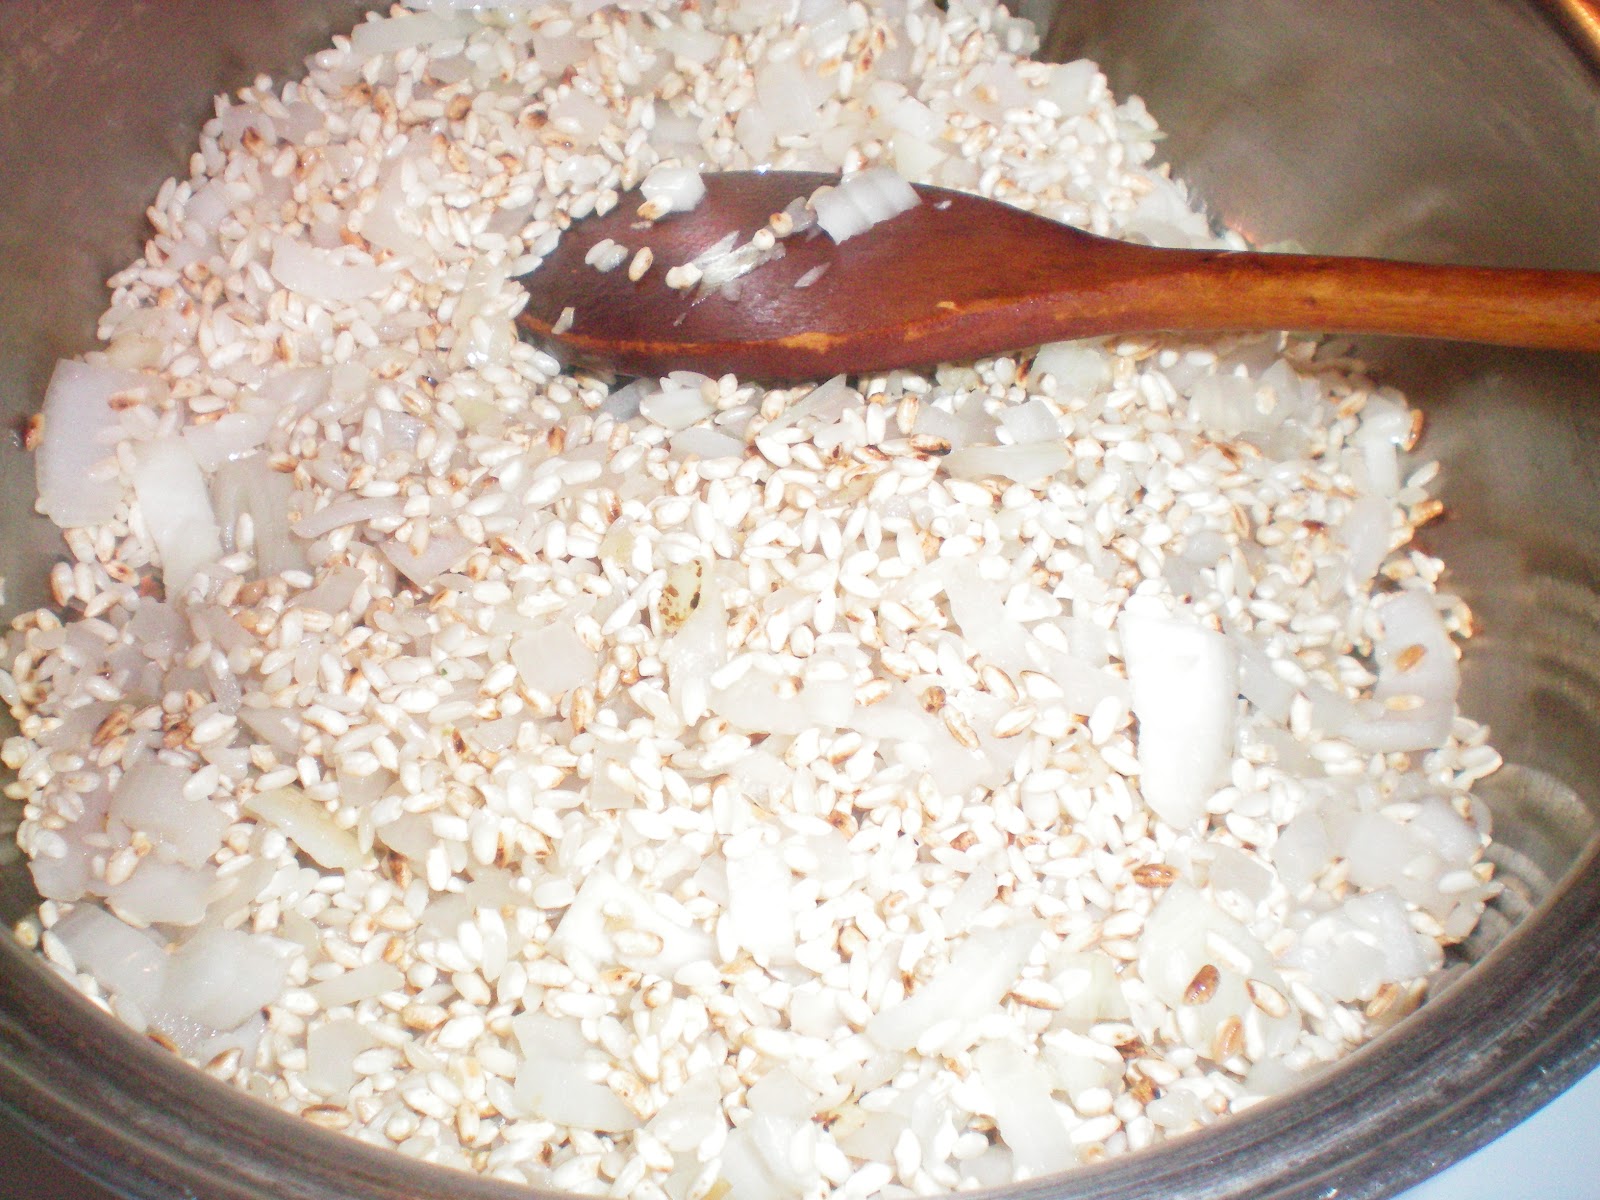
Step 3: Rice should look like this when toasted. Add in garlic and saute till aromatic.

Step 4: Add in onion. Continue to saute till onion has softened slightly.

Step 5: Add in the can of diced tomatoes, juice and all. Mix in the chicken broth, cumin, jalapeno, salt and pepper. Stir well to combine. Cover pan and let mixture comes to a boil over medium high heat. As soon as it comes to a boil, turn heat down all the way to low. Let cook for 25 minutes, covered.

Step 6: When the time is up, add in the chopped fresh parsley. Return the cover and let pan sit on the cool side of the stove. Allow rice to steam for another 10 minutes before serving.

Serve Mexican rice with steak fajita, chimichanga, burritos, tacos or your favorite Mexican dish. Or if you are a vegetable lover like me, serve the rice with grilled vegetables. Always have pico de gallo, guacomole and sour cream on hand when serving Mexican meal.

Wednesday, April 20, 2011

Grilled Sticky Rice - Pulut Panggang

Grilled Sticky Rice or Pulut Panggang is one of my all time favorite tea time treat. The grilled sticky rice is served among a few other different types of Malay sweets and snacks including fried banana fritters, curry puffs and steamed kuehs ~ sweet Malay desserts. Be it a legacy inherited from the colonial times or just a nice elaborate break time from the heat of the mid-day sun, tea time tradition in Malaysia is a feast to be savored. Among the Peranakan ~ the Straits Chinese clan in Malaysia, pulut panggang and rempah udang are treats commonly made to celebrate auspicious occasions. Birthdays, Weddings, New Year and the likes.

Traditionally, the pulut panggang is filled with a mildly spicy coconut sambal while the rempah udang uses shrimp and dried shrimp cooked in a mild spice blend. When I first started out making grilled sticky rice, I followed Aunt Lily's recipe to emulate the sticky rice I know from my childhood. Since a few people at our party is allergic to seafood, I came up with my own filling using a blend of spice mix and chicken instead~ Sambal Serunding.

Getting the right sticky rice is important as different grade sticky rice will produce different results. In making grilled sticky rice, I usually splurge a little and get the best Thai brand sticky rice I can find at the Asian grocery. Thailand has the best sticky rice available when it comes to making Southeast Asian sticky rice treats. It involves multiple step in preparing this dish but the result is so worth it, particularly if you are a big fan of sticky rice like me.


Grilled Sticky Rice - Pulut Panggang
(Makes 25)

Ingredients
25 pieces 6"x3" banana leaves (washed and pat dry) - You can find frozen banana leaves at the Asian store
50 toothpicks


For the sticky rice

1 1/2lb sticky rice (washed and soaked overnight)
1 350ml-can of coconut milk ( Do not shake the can, use the cream part only)
1 1/2 Tbsp sugar
1 tsp salt
2 pieces of pandan leaves (Washed and tied into a knot)

For the filling
1 lb chicken breast meat, baked and shred fine or 3 cups of chicken meat floss (you can find this at the Asian grocery)
1 cup grated coconuts
8 dried hot peppers (de-seed and soaked in hot water till soft)
8 shallots
1 large onion
1 lemongrass
2 cloves of garlic
2 tsp coriander powder
1/8 tsp galangal powder
3 Tbsp canola or vegetable oil
2 Tbsp sugar
salt to taste

Directions

Step 1: Wash sticky rice till water runs clear. Soaked in cold water and leave on kitchen counter overnight.

Step 2: The next day, start by preparing the filling. Toast coconut in a pan till golden brown. Set aside.

Step 3: In a food processor, blend onion, shallots, hot peppers, garlic and lemongrass till fine. Heat up 3 Tbsp of oil in a pan. Add in spice blend. Cook over low heat till spice mix is aromatic, about 10 minutes. Stir occasionally. 

Step 4: Once spice mix is aromatic, add in finely shredded cooked chicken or chicken floss and toasted coconut. Toss till well combined.

Step 5: Continue to cook filling till it has all dried out. Add in sugar and salt to taste. Continue to cook till its color turned brownish, which means the spice mix is fully cooked. The filling should be dry.

Step 6: Dish filling out in a bowl and set aside.

Step 7: Prepare banana leaves. Cut into 6"x3". Washed and pat dry. Set aside.

Step 8: Lined a steamer tray with cheese cloth. Drain sticky rice into tray. Add in the knotted pandan leaves.

Step 9: Steam sticky rice over high heat for 20 minutes. Make sure water in the pot is not touching the sticky rice. You do not want mushy sticky rice.

Step 10: Meanwhile, open a can of coconut milk without shaking the content. This is the brand I use for coconut milk aside from Chao Koh brand. If you can find fresh coconut milk, use the fresh coconut milk instead.

Step 11: Skimp off the thick coconut cream at the top of the can carefully without stirring the content. Place the thick coconut cream in a bowl. Reserve the remainder of the thin coconut milk for other use. Add in sugar and salt to the coconut cream. Stir well to combine.

Step 12: Once the sticky rice is done steaming for 20 minutes, remove the pandan leaves.

Step 13: Add all the sticky rice into the bowl with coconut cream. Toss to mix well.

Step 14: Cover the bowl with a lid and let stand for 5 minutes till all coconut cream has been absorbed by sticky rice.

Step 15: Return sticky rice into the steamer tray lined with cheese cloth. Steam over high heat for another 15 minutes.

Step 16: Once sticky rice is cooked, prepare the assembly line. In a small bowl, dish out about 2 cups of sticky rice. Leave the rest of the sticky rice in the steamer tray to keep warm.

Step 17: Place a piece of banana leaves onto the board, smooth side up.

Step 18: Place about 2 Tbsp of sticky rice onto banana leaves, leaving 1 1/2 inch space all over. Press the sticky rice to make a shallow well in the center.

Step 19: Place a tsp of filling in the center of rice.

Step 20: Fold the two sides together, making sure the rice is covering the filling. Roll the parcel up into a tight roll, like sushi.

Step 21: Hold one end of the banana leaf together.

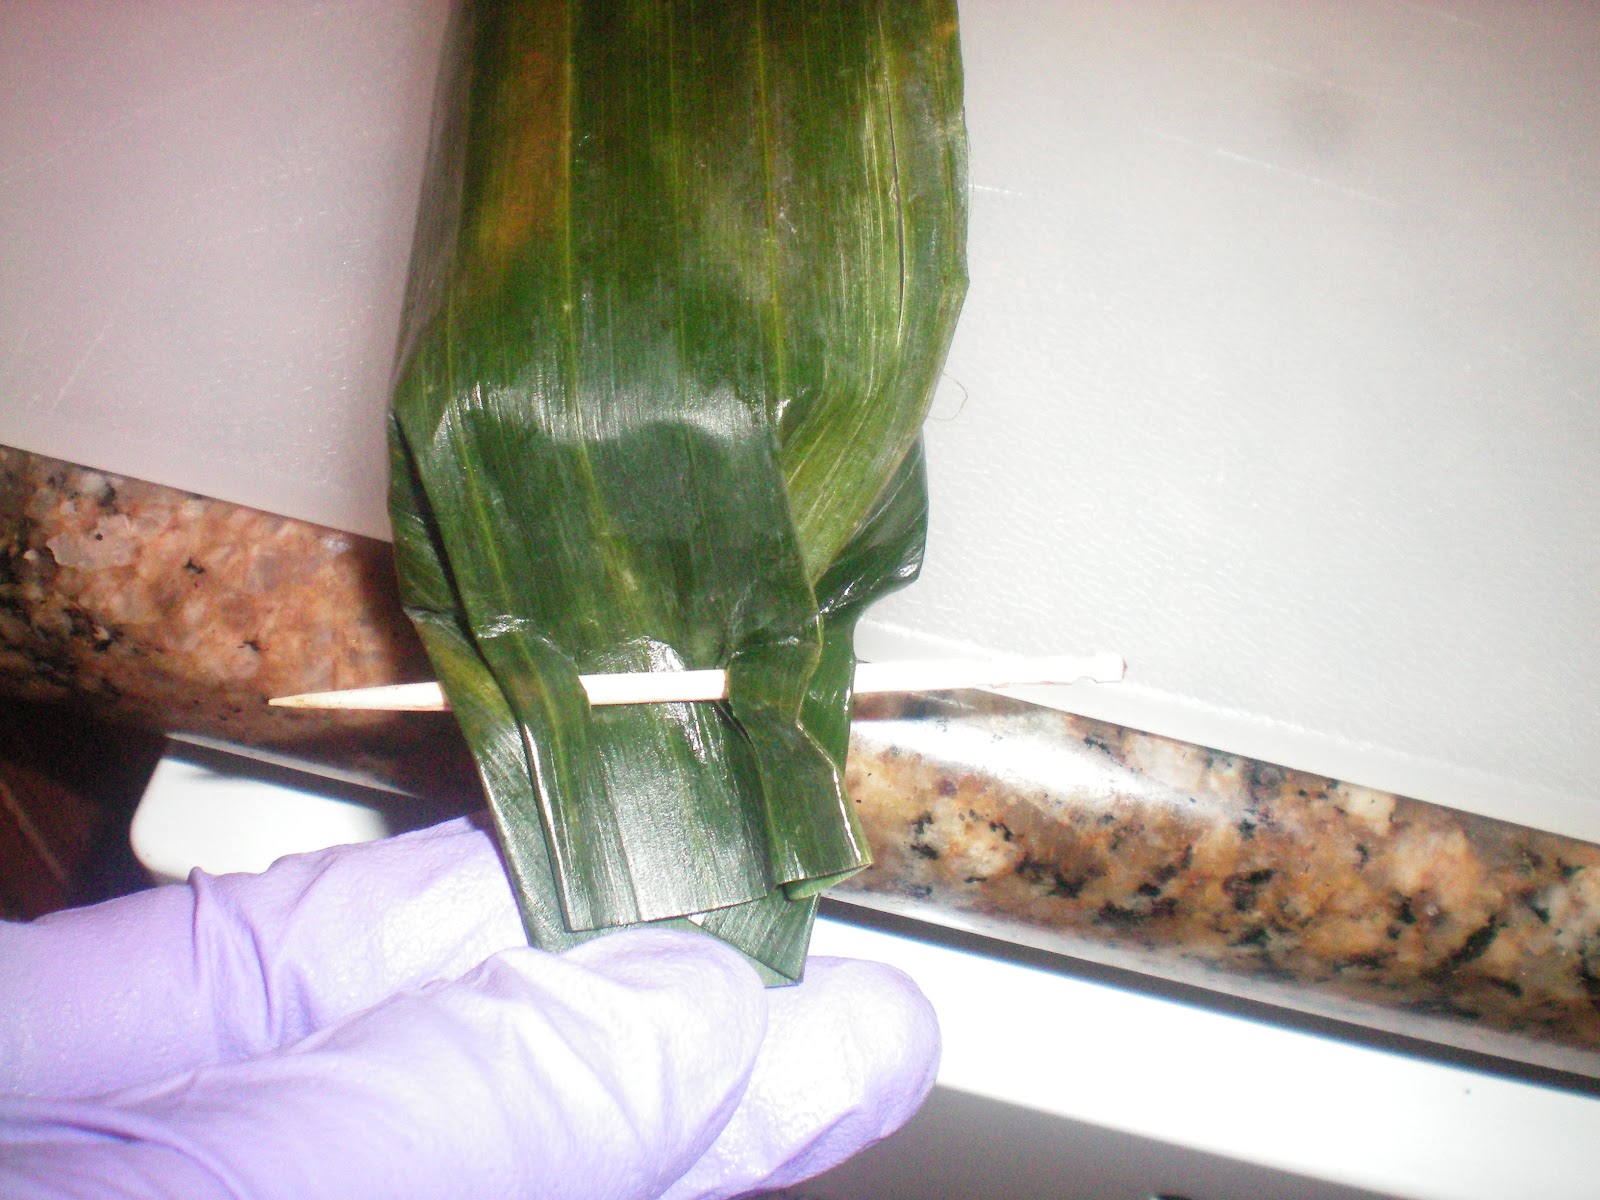
Step 22: Using a toothpick, close the end tight. Repeat with the other end of the banana leaf.

The sticky rice roll should look like this when done. You will want to roll it tight and ensure the toothpicks are holding the end securely. You do not want the parcel to fall apart during the grilling process.

Step 23: Repeat till all sticky rice and filling is used.

Step 24: To cook, grill sticky rice till the banana leaves wrap has grill mark on it. About 2 minutes per side.

It should look like this when done.

Serve warm or at room temperature. One word to describe this: Heaven!