Sunday, July 17, 2011

Blueberry Tower Muffins

  
Starting a new job soon and will not have as much time to bake as I would like. Oh well, there is always the weekends except that next weekend is all filled up with projects and wedding. Don't you just love summer? Speaking of, what is summer without the berries and blueberries at that. Love those tiny pearls of yumminess especially when transformed into Blueberry Tower Muffins. Its namesake probably explain everything. These muffins rise so high, hence, tower. I love the light airy texture of the muffins compared to the other denser versions of muffins. Sorry, no step-by-step pictures this time cos I have forgotten to snap any while I was making them.

Blueberry Tower Muffins
(Adapted from Boston Globe)
Ingredients
2 1/2 cups flour
1/2 cup sugar
1 tablespoon baking powder
1/2 teaspoon salt
1 1/2 cups blueberries
2 eggs, well beaten
3 tablespoons melted butter
1 cup milk


Directions

Step 1: Mix or sift together the flour, sugar, baking powder and salt. Mix
berries with 1/4 cup of this mixture and set aside.
Step 2: Beat eggs with melted butter, then add rest of mixture and milk. Mix in blueberries
lightly and stir until well blended.
Step 3: Place muffin liners in muffin tins and fill halfway. Bake at 350 for 25 minutes or until done.

Makes 18 muffins.

Wednesday, July 13, 2011

Homemade Zucchini Relish - The day I cook in a bucket

The first time I cook in a bucket was when I made Zucchini Relish last summer. Dad put in two zucchini plants for me last year and when they grow, they grow! Armed with an abundance load of zucchini sitting on the kitchen counter, I started searching high and low for zucchini relish recipe to use every single one that came out of my garden. I found one online and then mum's boss decided she will share with me her family's zucchini relish recipe. After comparing the two recipes I have obtained, there really is not much difference between the two except for her boss doesn't want me to share her family recipe with others.

Fear not, the one I found online is meant to be shared. It is equally as good. The best way to use the relish is of course with hotdogs and hamburgers. However, if you are not a fan of either, try using the relish in tuna salad, egg salad and the likes. Do not let the long winded process deter you from making your own relish at home. The end result is so good so that the off-the-shelf relish tasted bland in comparison. The sweet tangy zucchini relish is good in wraps with tons of lettuce, cucumber and tomatoes too.


Homemade Zucchini Relish
(Adapted from Johnson)
Ingredients
10 cups unpeeled zucchini, coarsely grated
4 cups onion, chopped
1 large red bell pepper, chopped
1 4oz can chopped green chiles
3 Tbsp canning salt
3 1/2 cups sugar
3 cups white vinegar
4 tsp celery seed
1 tsp black pepper
1 Tbsp ground turmeric
1/2 tsp ground nutmeg

Directions

 
Step 1: In a large bowl, or in my case a large bucket as I was making a huge quantity, combine all the chopped vegetables.

Step 2: Add in the canning salt. Mix to combine well. The salt is important to draw out the moisture from the vegetables.

Step 3: Cover bowl or bucket with plastic wrap and foil. Place in the fridge or a cool dry place overnight.

Step 4: The next day, washed and drained the vegetables. Ensure that they are thoroughly drained.

Step 5: In a large pot, combine sugar, black pepper, celery seed, turmeric and nutmeg.

Step 6: Add in vinegar and stir to combine.

Step 7: Bring mixture to a boil.

Step 8: Add in zucchini mix and let simmer for 10 minutes.

Step 9: Once relish has cool somewhat, divide relish between clean jars.

Step 10: Bring a large pot of water to boil. Submerge jars into boiling water. Boil for 10 minutes. Remove and set out to dry. Repeat with remainder jars.

Step 11: Leave jar on kitchen towel. Let cool to room temperature before storing in pantry. Refrigerate the relish after opening the jar. It will keep well in your pantry if left unopened for at least 3 months, depending on how you store it.

Sunday, July 10, 2011

Bún Rice Noodle Salad with Vietnamese Restaurant Style Grilled Lemongrass Pork

It was a hot summer day, one of those days that make you doesn't feel like doing anything at all. My only resolution to cooking that day was to use the grill outdoor as I hate to overheat the house. Thank God we got the ac fixed, the house is nice and cool now, we intend to keep it that way.

Near supper time, I was at a lost as to what I can cook when suddenly I remember a summer Vietnamese dish: Bún! For the uninitiated, Bún is a Vietnamese Rice Noodle Salad. I love how refreshing this dish is as it combined lots of lettuce, shredded cucumber, onions and fresh herbs, all nicely mixed with heaping tablespoon full of nuoc cham dipping sauce.


So whom do I go to when I need great Vietnamese recipe which I can count on? Andrea Nguyen of the famed blog Viet World Kitchen, of course! If you have never tried the Vietnamese Bún before, go ahead and try it now. It is so healthy and refreshing, I can really eat this all summer long.

Bún Rice Noodle Salad with Vietnamese Restaurant Style Grilled Lemongrass Pork


Recipe adapted from Andrea Nguyen
(Serves 2)

Ingredients
2 pieces of dried rice noodle, soaked in cold water for an hour to soften
1 cup of fresh Vietnamese herbs, basil, mint or other herbs you prefer
1/2 cucumber, seeded and finely shredded
1 cup raw beansprouts, washed and dried thoroughly
1/2 small onion, thinly sliced
A few whole Thai chilli peppers, thinly sliced

For the pork
2 piece of boneless center-cut pork chops, about 1-inch thick
2 Tbsp light brown sugar
1 Tbsp chopped garlic
1 Tbsp chopped shallot
1 stalk lemongrass, finely chopped
1/4 tsp black pepper
1 1/2 Tbsp fish sauce
1 1/2 tsp dark soy sauce
1 Tbsp oil 

For the Nuoc Cham Dipping Sauce
3 Tbsp fresh lime juice
2 Tbsp sugar
1/2 cup water
2 1/2 Tbsp fish sauce
1 small garlic clove, finely minced
2 small Thai chilli, thinly sliced


Directions
 Step 1: Prepare the pork marinade. Finely chopped the lemongrass, garlic and shallot.


Step 2: In a bowl, combine oil, brown sugar, dark soy sauce and fish sauce.


Step 3: Mix in chopped lemongrass, shallot and garlic. Stir to mix well.

Step 4: Submerge pork chops into the marinade. Leave to marinade for 45 minutes at room temperature. You can also leave pork chops in refrigerator. Just remove pork chops 30 minutes prior to grilling.


Step 5: Make the nuoc cham sauce by combining all the ingredients in a small bowl. Refrigerate until ready to use.

Step 6: To assemble, boil a pot of water. Cook rice noodle in water for 2 minutes, drained and set aside.
 Step 7: Preheat an outdoor grill to 450F. Grill pork chops till cooked, about 7-8 minutes on each side. Let rest and slice thin. Place some noodle salad at the bottom of a bowl. Top with lettuce, cucumber, bean sprouts, herbs, onion and pork slices. Add in nuoc cham sauce.

 Toss well and served.

Wednesday, July 6, 2011

Mum's Stuffed Roasted Chicken

We love mum's stuffing. Not just on Thanksgiving day. Her stuffing recipe is so versatile that we used it in chicken, of course, pork and steak. I have written a post on her stuffing when dad was making his super delicious stuffed flank steak a few months ago. When the craving hits, once again, I recruited mum to make her stuffing. The end result was a delicious golden roasted chicken with mum's stuffing.


Mum's Stuffed Roasted Chicken
(Serves 8-10)
Ingredients

7- 8lb whole chicken, preferably a roaster
Salt to taste


Mum's New England Style Bread Stuffing
1 loaf of white bread (24oz)
1 1/2 tsp of Bell's seasoning
2 tsp of rubbed sage
1 stick of butter
1 rib of celery,  finely chopped
1 onion, finely chopped
salt & black pepper, to taste

Directions

 Step 1: Prepare stuffing. Diced bread into small cubes.

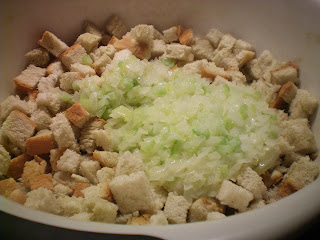
Step 2: In a microwave safe bowl, nuke butter with onion and celery till butter is fully melted for about 2 minutes. Check after a minute, stirred.

Step 3: Combined butter-celery-onion mix with bread.

Step 4: Add in Bell's seasoning and rubbed sage. Toss to mix well. Set aside until ready to use. Meanwhile, preheat an oven to 350F or 176C.

Step 5: Pat chicken dry with a paper towel once removed from its packaging. Place chicken on top of a baking pan lined with wire rack. Sprinkle the chicken lightly with salt.

Step 6: Stuffed the chicken with stuffing by making a small snowball of stuffing and placed it inside the cavity. Press lightly to fit. You do not want the stuffing to compress tightly.

Step 7: Using metal skewer, pull the flaps of skin at the cavity's opening together and secure tightly. You may need to use 2 or more metal skewer to seal it properly.

Step 8: Do not worry about the unused stuffing. Just place it in a baking dish or wrapped it in foil. Bake for 15-20 minutes in the oven prior to serving.

Step 9: Bake chicken, breast side down first. It will take between 20 and 25 minutes per lb to cook the bird. Turn the bird halfway, breast side up to ensure even browning. Serve with mashed potato, chicken gravy, cranberry jelly and salad/steamed greens.


Monday, July 4, 2011

Indonesian Style Spicy Grilled Chicken - Ayam Panggang Padang

Padang style cooking in Indonesia refers to the Minangkabau tribe who hails from Sumatra, the island northwest of Jakarta. Why will I be interested in making Minangkabau food? Cos of rendang, their thick creamy coconut curry. I love making rendang in the winter months as it is the perfect time to make a stew like dish. However, in the summer when the outdoor grill beckons, the Padang-style grilled chicken calls my name.

The perfect accompaniment to the spicy grilled chicken will of course be coconut rice. The family loves this dish so much so that I have already been given the green light to make it a staple on dinner table as often as I want to. Nice!


Indonesian Style Spicy Grilled Chicken with Coconut Rice- Ayam Panggang Padang
Ingredients
3.5-4lb chicken, cut into quarters or 3 split chicken breast, cut in half
1 stick of cinnamon
3 pieces cloves
3 pieces kafir lime leaves
1 piece turmeric leaf
2 cups coconut milk
3 Tbsp cooking oil


Spices to grind
4 pieces chilli peppers
3 cloves garlic
4 shallots
3 pieces candlenut or walnuts
1/2 tsp whole peppercorn
1 tsp whole coriander
1/2 tsp cumin
1/2 tsp fennel
1-inch ginger
1.5 inch turmeric

Coconut Rice
1 cup uncooked rice, washed and drained
2/3 cup coconut milk
3/4 cup water
1 screwpine leaf/pandan leaf, tied in a knot
1/4 tsp salt 

Directions
Step 1: Brine chicken in water-salt-sugar mix for 2 hours. Drained and pat dry with a paper towel. Set aside.

Step 2: In a grinder, ground black pepper, coriander, fennel, cumin and walnuts to till fine.

Step 3: In a food processor, combine ground spices with chillies, garlic and shallots. Blend well and set aside.

Step 4: In a pan over low heat, combine chilli mix with cloves and cinnamon stick. Stir and let cook for 10 minutes till spices is cooked and oil is separated from the spice mix.

Step 5: Add in chicken pieces and stir to mix well. Turn heat up to medium. Cook for 20 minutes.

Step 6: Add in coconut milk. Stir to mix well.

Step 7: Cook till gravy is reduced by 1/3, about 25 minutes. Stir constantly.

Step 8: Transfer chicken and gravy to a baking pan lined with foil. Heat a grill to 450F. Turn off the center burner. Place baking pan at the center of grill. Cook till gravy has all dried up. Remove chicken from pan and place on grate directly. Grill chicken till it is lightly charred.

Step 9: Spoon remainder gravy over grilled chicken.

Step 10: To make coconut rice, combine 2/3 cup coconut milk, 3/4 cup water, salt, 1 cup uncooked rice and a pandan leaf in a pot. Bring water to a boil over medium low heat, stir occasionally to avoid burnt. Once it starts boiling, reduce heat to low. Cook over low heat for 25 minutes.

Step 11: Remove pandan leaf. Let rice sit for 10 minutes before serving. Fluff coconut rice with a fork.

Step 12: Serve chicken with coconut rice and fresh salad.