Saturday, June 25, 2011

Crispy Cheese Stuffed Pork Chops

I have been really busy lately. Sorry for all the slow posting. Yes, I am still making supper every night, just do not have the time to post them all. Will get back on track once things settled down.

If you have been reading my blog since early this year, you may recall that I am not a big fan of pork. I am still not a big fan of pork. However, the crispy cheese stuffed pork chops which I featured in this post is something I will not mind to eat again.

The inspiration came from the weather, sort of! It has been raining almost everyday this week and grilling is straightly out the window. Since I have to cook in my kitchen, I figured why not make chicken Cordon Bleu. Then again, I do not Swiss cheese nor ham in my fridge. Oh well, why not make pork chops stuffed with cheese then. That is how this recipe comes about. It is so easy to prepare that I am seriously contemplating to put it as one of my rotation menu.

Crispy Cheese Stuffed Pork Chops
Ingredients
3 boneless pork chops, about 1-inch thick
1 cup of shredded monterey jack or cheddar cheese
1 large egg beaten
1/2 cup flour
1 cup plain breadcrumbs
3 Tbsp grated romano cheese
1 tsp dried parsley
5 Tbsp canola oil
salt and pepper to taste

Directions

Step 1: Lightly pound the pork chops thin. Be careful not to tear the pork.

Step 2: Sprinkle pork chops lightly with salt and pepper.

Step 3: Place 1/3 cup of shredded cheese on the center of pork chops, leaving about 1-inch space from the edge.

Step 4: Fold the sides together.

Step 5: Roll the pork chops tightly to seal.

Step 6: use wooden toothpicks to secure the two ends to avoid cheese from oozing out during the baking process.

Step 7: Wrap pork chops individually in sandwich bags. Place in freezer for 15 minutes so that cheese has time to firm up a little. This step is extremely important to avoid cheese from oozing out during baking process.

Step 8: To prepare pork for cooking, roll pork in flour seasoned with a little salt and pepper.

Step 9: Dip pork chops in egg wash.

Step 10: Coat with breadcrumbs. Repeat with egg wash and breadcrumbs again to double coat the pork.

Step 11: Place coated pork chops in fridge for 15 minutes prior to cooking to let coating to set properly.

Step 12: Heat 5 Tbsp oil in a pan over medium heat. Preheat an oven at 375F.

Step 13: Lightly fried pork chops till golden brown, about 5 minutes on each side. Place pork chops on a baking sheet lined with wire rack. Bake for 15 minutes till cooked.

Served pork chops with pasta salad.

Melted cheese inside crispy pork chops, anyone???


Tuesday, June 21, 2011

Hong Kong Bakery Style Chicken Pot Pie

As a succession to the Hong Kong bakery style baked goods I have featured previously, this is another favorite from the oriental bakery.

The distinct difference between the American version of chicken pot pie to those of the Hong Kong style is the use of pate brisee in the latter version instead of the regular puff pastry. Pate Brisee in short is a crumbly buttery sweet crust used for either sweet or savory fillings. I love the crust made using this method as it gives the pie a rich sweet taste, the perfect contrast to the savory chicken pot pie filling.

Do not be fool by the size of this pies. They may look small but the pate brisee crust can do a great job filling you up even for the biggest appetite. The use of pate brisee makes it tedious to form the pies as you have to use your fingers and shape each one individually as opposed to rolling it out in a large sheet. Believe me, I try rolling out the dough but it just wouldn't work.

Now, this is what I called perfection.

Hong Kong Style Chicken Pot Pies
(Makes 12 mini pies)

Ingredients

For the Crust
320g all purpose flour (about 12 oz)
4 tsp custard powder
1/4 tsp baking soda
200g butter, softened at room temperature (about 7 oz)
1 large egg, beaten
30g powdered sugar (about 1 oz)

For the Filling
1 boneless, skinless chicken breast (about 10oz or 280gm)
40 gm carrot, corn and pea mix (about 1/4 to 1/3 cup)
4 pieces of white mushrooms, sliced thin
1 medium onion, chopped fine
1 Tbsp butter

Marinade for Chicken
2 tsp chinese cooking wine or dry sherry
2 tsp soy sauce
2 tsp corn starch
1 tsp sesame oil
1/4 tsp black pepper

Sauce
2 Tbsp butter
2 Tbsp flour
200 ml water + 60 ml milk
2 tsp chicken granules or bouillon
1/2 tsp salt
1/4 tsp sugar

1 egg + 1 tsp oil for glaze

Directions

Step 1: Prepare the filling.


Step 2: Combine chicken cubes with marinade. Set aside.

Step 3: In a pan over medium heat, melt 1 Tbsp of butter. Add in onion and cook till softened.

Step 4: Add in the diced chicken. Cook for 5 minutes.

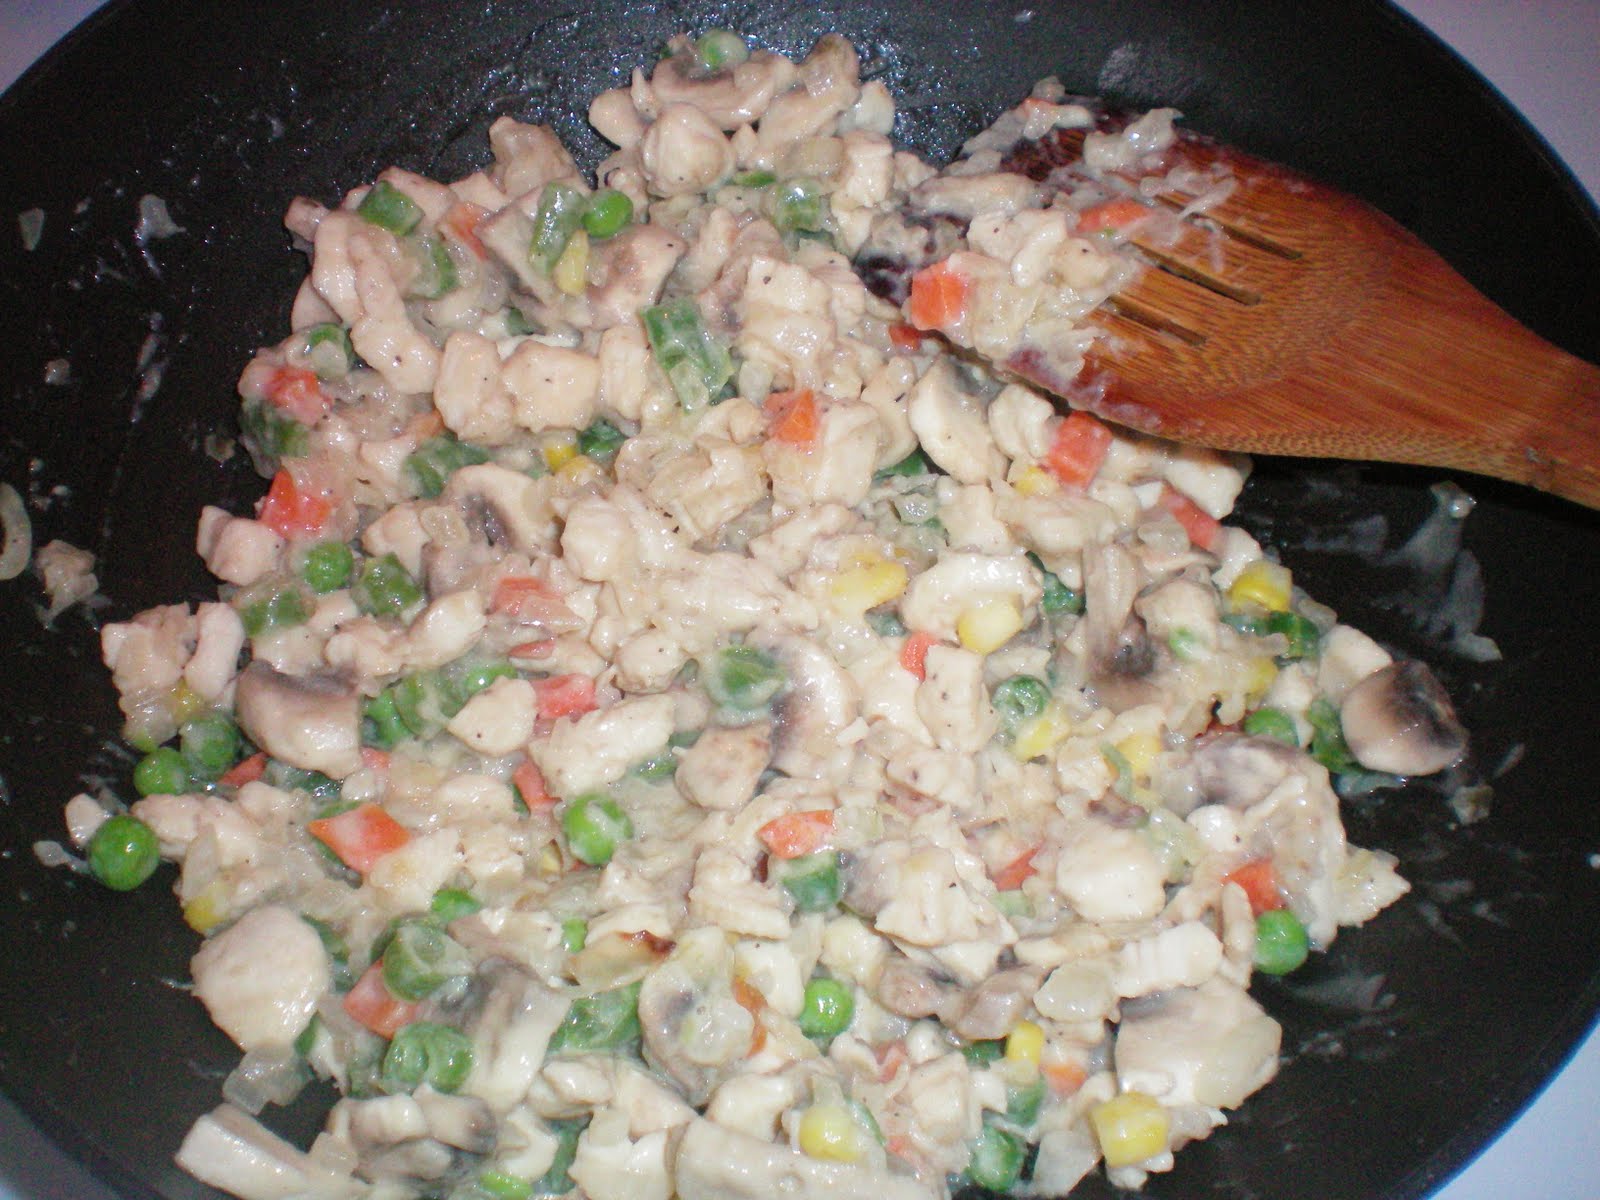
Step 5: Add in the mixed vegetables and mushrooms.

Step 6: Stir well to combine and make sure that chicken is cooked all the way through. Dish out and set aside.

Step 7: In a clean pan, melt 2 Tbsp butter over low heat. Add in flour. Cook for 2-3 minutes over low heat to make a white roux.

Step 8: Add in the chicken and vege mix. Stir to coat well with the roux.

Step 9: Add in the milk, water, chicken bouillon, salt and sugar mix.

Step 10: Turn heat up to medium high and cook till chicken filling comes to a boil. Sauce should be thick and coat the filling well. Dish out and set aside to cool.

Step 11: Prepare the pie crust. In a large bowl, sift together flour, baking soda and custard powder.

Step 12: In a separate bowl, beat the softened butter till light and fluffy.

Step 12: Add in the powdered sugar. Beat till well combined.

Step 13: Add in beaten egg. Mix till well combined.

Step 14: Mix in the flour. I find that it is easier to work with your hands to combine the butter and flour mix.

Step 15: Divide the dough into two. One for the bottom and the other for the upper crust. Wrap doughs in plastic wrap. Chill in refrigerator for 30 minutes.

Step 16: Lined a 12-cup muffin pan with paper cups. Bring out one of the pate brisee from the refrigerator. Cut into 12 equal pieces.

Step 17: Place one square of dough into each paper cups. Using your thumbs, press the dough to cover the entire surface of the paper cups as evenly as you possibly can. Dork Dock the dough.

Step 18: Preheat oven to 400F. Place 1 1/2 Tbsp of chicken pie filling into the dough. Bring out the second dough from the fridge and cut into 12 equal pieces. Flatten dough by pressing it in between your palms. Place dough on top of chicken pie as upper crust. Using your fingers, gently seal the pie.

Step 19: Combine one egg with 1 tsp of oil. Glaze the crust with the egg wash.

Step 20: Bake pies at 400F for 10 minutes. Reduce the heat to 350F and continue baking for another 15 minutes till golden brown.

Let cool for at least 10 minutes before serving.


Monday, June 20, 2011

Feel Good Bumble Berry Pie

When the world gives you that sinking feeling in your stomach and you feel everything looks bleak or bland, bake a pie. Seriously, who doesn't smile at the sight and smell of a freshly baked pie?


I had my first taste of Bumble Berry pie during our family vacation in Maine. The combination of fresh berries and flaky pie crust won us over and we instantly fell in love with it. Aside from the lure of the berries, the most important part was the reminder of what a great time we had during our vacation. The reminder of summer and good times, priceless!


Making berry pie is not as complicated as it seems, that is if you know the ingredients you are working with well enough. The trick to making a good berry pie is one's ability to ensure the juices of the pie is well within control. If you have any experience baking with fruit, then you will know the headache and heartache involved when the juices released by the baked fruit threatened to overflow from the pastry casing and ruined the entire pastry. Adding to much starch into the filling will result in a gluey pie filling while not adding enough......a flood of berry juices will ooze out and drown that poor pie.


Striking a balance to reach the nirvana state of the pie filling can be complicated. However, if you have done enough research on fruit pie recipes, you have probably get enough tips and tricks to achieve the fruit pie perfection that we novice bakers are striving so hard to achieve. Please share your experience here with me and I promise I will spread the word of your expertise.


What is your feel good food that you will make to brighten everyone's day?

Feel Good Bumble Berry Pie
(Makes one 10-inch double crust pie)

Ingredients


For the pie crust
2 2/3 cup all purpose flour
1 tsp salt
1 cup shortening
7-8 Tbsp cold water

For the filling
5 cups or 40oz of mixed berries, fresh or frozen (strawberries, raspberry, blueberries, blackberries)
1 cup sugar
1/2 cup all purpose flour
1/4 tsp salt
1/2 cup plain breadcrumbs
Zest of 1/2 lemon (optional)
2 Tbsp of milk, for glazing

Directions
Step 1: Make the pie crust. Combine salt and flour in a large bowl. Cut in the shortening with a pastry cutter till it resembles coarse breadcrumbs.

Step 2: Once the desired consistency is achieved, add in the cold water. Start by adding 7 tablespoons of cold water.

Step 3: Mix the flour well. Add another tablespoon of water if it feels dry. Gather all the dough together and form it into a ball.

Step 4: Divide the dough into two disks. Wrap with plastic and let rest in the refrigerator for 30mins.

Step 5: Once dough is well rested, begin with one disk of dough to form bottom pie crust. Preheat the oven to 425F.

Step 6: In between two sheets of wax paper, roll dough out to about 12-inch in diameter.

Step 7: Peel wax paper gently away from dough. Fit dough into pie plate to fit snugly by gently pressing dough into pie plate. Sprinkle 1/4 cup of breadcrumbs onto pie crust.

Step 8: In a large bowl, combine berries, flour, sugar, salt and lemon zest. Mix well to combine.

Step 9: Place berries, flour and sugar mix onto pie crust.

Step 10: Roll out the other disk of pie dough into a 12-inch diameter. Cover pie. Trim the sides, leaving a 1-inch overhang. Tug the pie dough underneath the bottom pie crust. Seal by applying slight pressure or crimp with the back of a fork.

Step 11: Place rack on the lower third rack. Bake pie at 425F for 30 mins. Reduce heat to 375F and continued to bake for an additional 30 mins.

Step 12: Remove pie from the oven. Let cool to room temperature before refrigerate.

Step 13: Serve pie with a scoop of vanilla ice-cream.